I decided that I was going to make my OWN "pseudo-kilt", in exactly the design I want, rather than pay $300 or so to buy one that's all customised and stuff. I just sort of had the epiphany the other day, and the idea grew and took form over the last couple days. I was going to start with a pair of jeans shorts, but then decided I wanted to use cargo shorts (black) for the base instead. This is a LOT easier than trying to create the waist band and actual, functional (read, have to function
correctly!) buckles and such, I believe.
Of course, I have never made a kilt before, and don't know how to use a sewing machine, so I don't expect it to be a $300 garment, but I DO think it's going to be pretty cool!
I'm sitting and
taking a break right now, after having worked on it for the last 4
hours, so I figured I'd post a few pictures of what I've done so far.
I
ended up finding a pair of shorts on clearance for $15 from Lane
Bryant. They aren't cargo shorts, but they are actually perfect for my
needs, as it turns out, and I have a pair of cargo shorts that a partner
was going to throw out that I'm going to cannibalise for pockets and
other "spare parts".
I forgot to take a picture of the "base" shorts before I started cutting, but they're just basic shorts.
Here
are the shorts after I cut the crotch out and cut it short.. so
basically, it's a VERY short skirt at this point. I'll be sewing the
kilty bits to this base, which will provide the basic structure.
I also forgot to take pics of the leather jacket that I'm cutting up
for the apron and perhaps some other parts, but believe me when I say
that, as a jacket, it was FUGLY!! I got it used for 99 cents, which was
still too much for the jacket, but a helluva deal for that much usable
leather!
This piece will be the mid-section of the apron.
These
are the bits that will overlap with the middle part of the apron. I
have a sort of idea on how I'm going to make that work with the pockets,
but haven't solidified that plan just yet.
For
the majority of the back, I just wanted black fabric. The cheapest,
thin, crappy ass fabric that I can get runs around $5/yard, so for 4-5
yards, that's getting pretty pricey, for dirt poor me, so I went to the
Goodwill right by my house and bought two nice, black, flat sheets for
$3.99 each. SCORE!!
I cut two pieces (one at each side,
so I have a hemmed edge for each piece.. Even more reason to use sheets
instead of regular fabric!) off one of them, but not sure if I'm going
to need both of them yet. We'll see after I finish pleating all the
Tartan for the side-ish panels.
Here, I've started
pleating the first piece. It's time consuming, but the pleats are
looking better than I expected on my first try with pleating anything
like this.
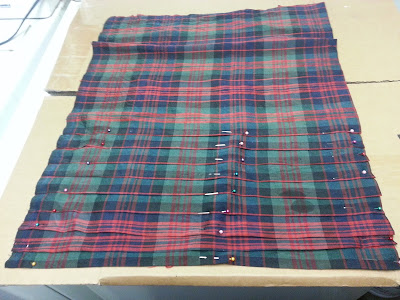
Here is the first section fully pleated, with the top of the pleats
sewn down. As you can see, it's about 1/4 of the original width, if
that! Later, I'll sew the pleats a bit further down too.
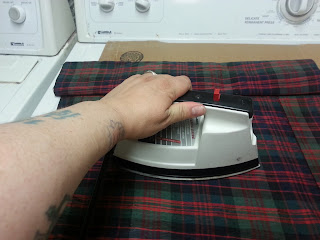
I then located the iron - I
knew
there was one in this house somewhere, 'cause I've seen my house mate's
slave ironing things - and ironed the pleated section, to get the
pleats nice and set in there properly.
Next,
it was time to drag out my hunk of Tartan and iron it. It was a
disaster, and I really don't iron, so it took a while, but I finally got
it all smooth and creased where I wanted to cut it.
And
then on to pleating the Tartan. It is a LOT more attention to detail
requiring, since I have to line up the plaid correctly.
Here's the first Tartan piece pleated, ironed, and partly stitched down.
Here is the black sheet section all nice and ironed.
Apron centre piece pinned to the base.
And the rest of the apron pinned on...
Here's the belt sitting in place (mostly) to get an idea of how it will look.
I decided to iron as I go for the pleating on the second Tartan piece, and it seems to be working better. It's turning out a LOT neater. I'm not going back and redoing the other one. It's fine, and I am relatively certain that the finished product will not be noticeably different because of it, but I am definitely happier with how the 2nd piece is coming along and wish I'd thought of doing it this way sooner.
OK. Off to pleat some more! Sleep is for pussies! (And I plan on being a total pussy after my 1050 appointment this morning!)


