
This is an account of how I built my really snazzy looking (IMO), smokeless, turbo air charged (OK, not turbo, but you can clearly hear the air rushing in! It's super cool! Err.. Hot, actually) fire pit, mostly sitting down, for about $110.00 +tax.
First of all, I read a lot of instructionals, and watched even more videos on the topic of DIYing a smokeless fire pit. There were lots of good builds, good ideas, and aspects of various ones that I liked. Most of them were either out of my budget range, and/or required a level of labour that I can no longer do, nor afford to pay for, and a crazy amount of them assumed that "on a budget" means under $1000, or even "really cheap" builds for $300 -$500.
The ones that were in the under $150 range were mostly ones made from repurposed junk and salvaged materials that were not the aesthetic I wanted, or they required the manual labour to locate, pick up, haul, load, and unload salvaged materials myself, which I'm just not able to do. As mentioned elsewhere in this blog, and known to many of y'all, I am disabled. My walking and standing time are seriously limited, and any serious lifting and working must be done seated. So, I needed something I could afford on a fixed income, DYI-able within my abilities and with very limited help, that still looked attractive, fit with the natural theme I wanted, and was easily usable for me as well.
I've never been one to give up once I decide I want to make something happen, so, next came the adapt, improvise, and overcome phase! I figured out what elements were really important for what I wanted, and what was just extra work for bragging rights.
I was able to do the majority of the work seated. I did have some help with bringing me stuff, but I also could have used my scooter and my Gorilla dumping wagon (These things are AWESOME, BTW) to do the hauling stuff myself. It just would have added a bit more time to the job. That said, that would be true even if I were fully able bodied, so no net difference.
I applied for a Dom Depot (AKA Home Depot. LOL) credit card, and got fifty bucks off the whole haul, plus free delivery, which helped a lot! You can get most of the supplies cheaper at Wally World, but with the $50 off, this was cheaper for me. Here's what I ended up with...
Supplies
• Retaining wall blocks x34 ($81.00)
The main structure of the fire pit, obviously. Cheaper stones than these can be had, to make your overall project even more budget friendly, but I really liked these a lot, and they fit within my under $150 cap.
• Sand ($7.59) (Available at WalMart for cheaper)
Insulates, to keep fire and heat contained, absorbs and helps distribute heat evenly, supports and helps even out the base stones, absorbs moisture, to help with drainage.
• Pea Gravel ($6.25) (Available at WalMart for cheaper)
Helps with drainage, heat distribution, and air flow.
• Lava rock ($14.29) (Available at WalMart for cheaper and a bigger bag)
Retains heat, to keep the fire pit hotter, longer, absorbs and helps distribute heat evenly, provides additional air flow for hotter and cleaner burning, and drainage.
Instructions
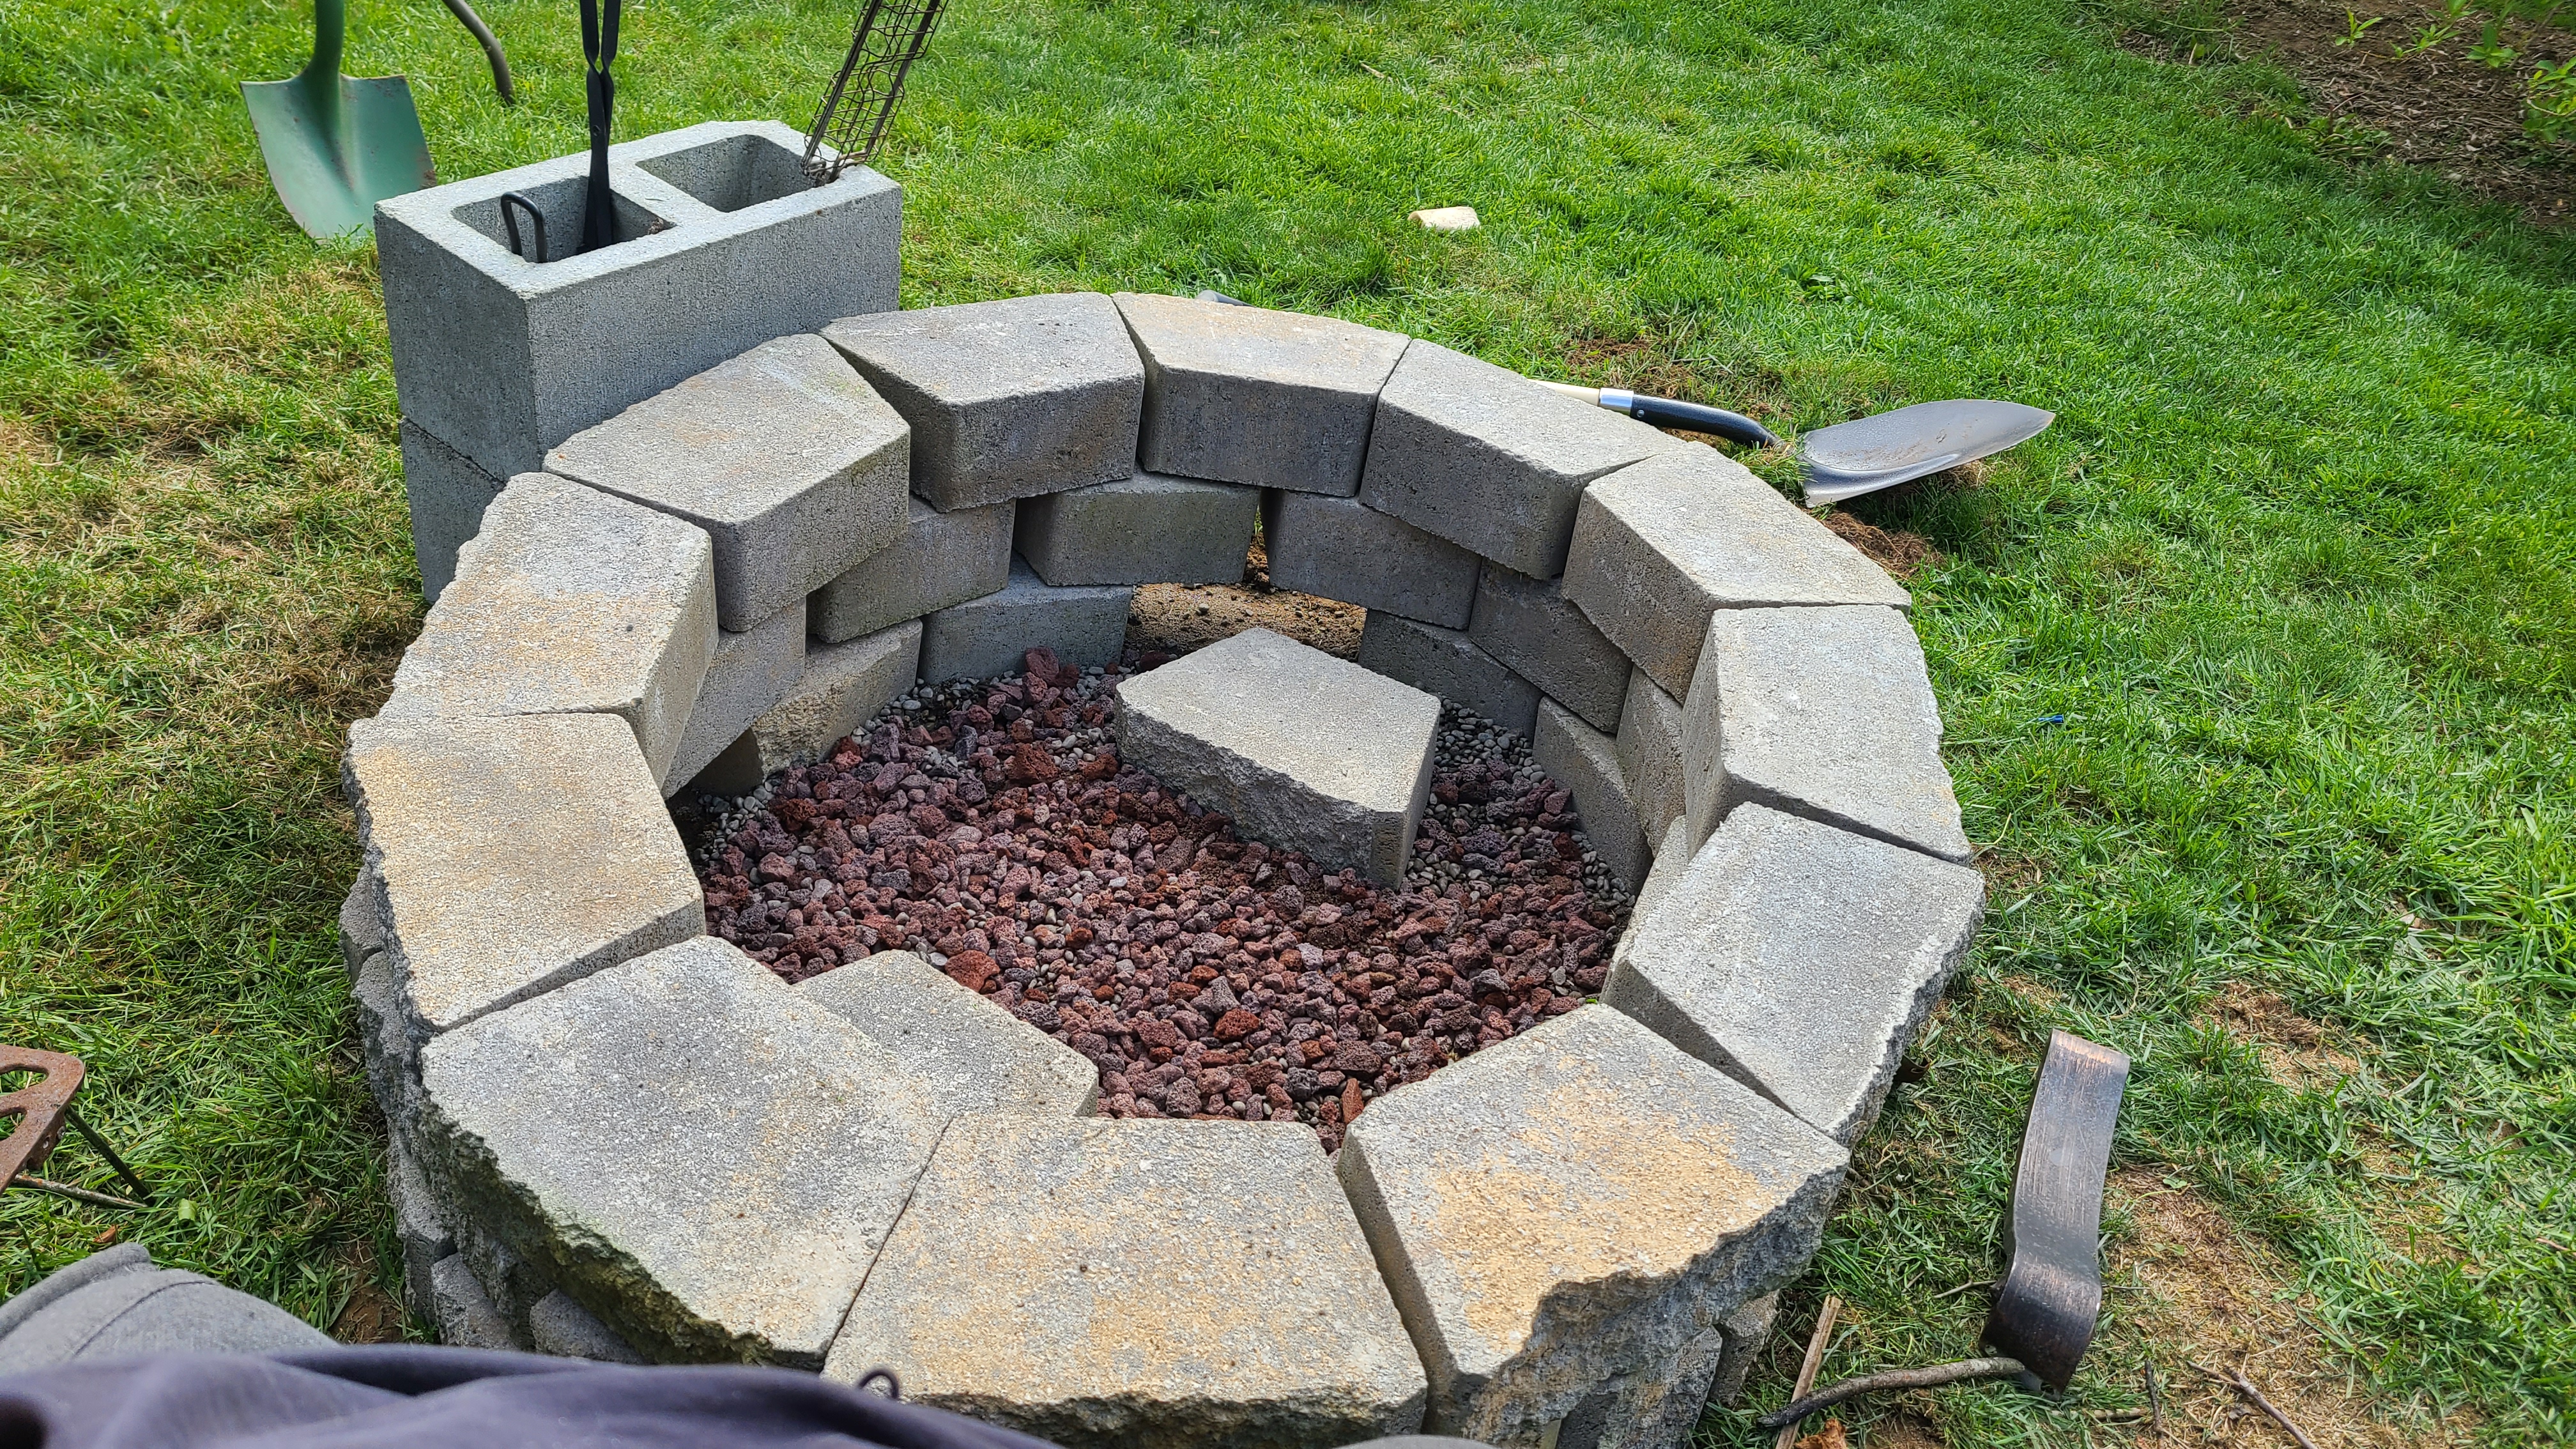
• Lay ring of 12 stones
• Mark around outside & move stones out of the way.
• Dig out the marked circle 2-3 inches deep.

• Lay sand & level - Dump the bag out in the circle and spread it out with a rake or something. A metal rake like the one shown is best for this, IMO.

• Replace the 12 stones, using sand underneath to level them as needed.
• Remove 4 stones opposite one another (make sure remaining stones stay put!)

• Lay 2nd two levels, staggering stones for each layer.
• Optional, but recommended - Place two stones inside, to support wood for fire building and/or for supporting cooking grate. Having the stones there to prop a couple logs on over your tinder and kindling REALLY improves fast and easy fire starting! It will up your fire game for real.
• Add pea gravel and level.


• Add lava rock and level.
 • Another optional, but definitely recommend step - I built a matching bench, right up next to the pit, with some additional retaining wall blocks. It is perfect placement for building the fire whilst sitting, and some additional seating that looks great.


