Showing posts with label Food. Show all posts

Monday, 31 August 2026

Recipe ~ Basic Hummus

Hummus in serving dish on plate with pita triangles, baby carrots, and celery sticks

As always, if you just want the recipe without the story behind it, click here.

Nothing says healthy, delicious, protein packed, quick and easy summer snack or lunch quite like a tub of savoury hummus and some pita (or pita chips - Yum!) and fresh, crisp, raw veggies!

But along with hotter days seemingly everywhere, these days, we've also seen food prices rising faster than the temperatures, and that especially includes "luxury" foods like hummus. 

 But, what if I told you that this delicious staple of Mediterranean eats is yet another example of some of the cheapest possible ingredients available turned into something good and healthy to feed lots of people, commandeered by the grocery industry to be sold as, "ethnic" (AKA expensive) food for hipsters and people with more dollars than sense? Yup! That's right, my friends. This  trendy, expensive food enjoyed by rich people all over the world started centuries ago in the Mediterranean/Middle East as a simple, cheap dish for poor people. And, unlike the humble haggis, the core ingredients haven't even changed much in all that time! The recipe is still almost the same as it was back when poor families used cheap local crops like chickpeas, garlic, lemon, and sesame seeds to mash ingredients together by hand in stone bowls, for a dip that gave workers cheap fuel for the hard, physical labour that they did every day just to survive. 

The exact origin of the dish is a matter of FIERCE dispute, with several regions claiming responsibility, and is an interesting read, if you are a nerd, like me. And if you really want to nerd out, it gets even more interesting

Fast forward a few thousand years, and as immigrants travelled to new countries in the West, they brought many of their food traditions with them. Before you know it, fancy chefs in big cities were adding it to their menus, also adding (of course) expensive toppings like pine nuts, lamb, and olive oil to make it "better" for diners willing to pay top dollar for such exotic fare. 

Next, doctors and food writers got on the bandwagon, dubbing chickpeas (rightfully, to be fair) a healthy superfood. So, now that those who could afford to pay more to eat healthy were properly primed, specialty groceries could sell small plastic tubs of this super healthy, heavenly hummus at crazy markups. Now, you can find it at pretty much any supermarket or convenience store, still marked up, but not quite as much, and warehouse and big box stores will sell it to you at significant savings, compared to what we've all gotten used to paying. 

Fun fact: The word "hummus" simply means "chickpea" in Arabic. In the Middle East, ordering just "hummus" may just get you a bowl of whole chickpeas; the creamy dip is actually called hummus bi tahini. Either way, it will still be a cheap accompaniment to your bread and veggies, cause it's still just a staple there, and the only extra ingredients you'll find are likely to be whatever happens to be in season or local spices and such, and the olive oil, cause that is much more available now, both in the Mediterranean and Middle East, and globally, to the point that it figures heavily as part of the Mediterranean diet. So do chickpeas and hummus, incidentally. 

Simple ingredients.  

hummus ingredients in standard food processor, mostly top down view, pre processing

I discovered how cheap, fast, and easy it really is to make this delightfully delish dish years ago, but somehow have neglected to post it until now. 

Back when I originally learned to make it, you still had to go to a higher end supermarket or order from Amazon to get tahini, but now it is available even at the local Walmart, or other big box store, right along with all the other ingredients. Even better, enough tahini, the most expensive ingredient, to make around 8 batches of this recipe, can be had for a few cents more than two 10 oz tubs of ready-made hummus at the same Walmart. And the rest of the ingredients for a 32 oz batch, all together, might buy you one more of those 10 oz tubs. Matter of fact, I'll put the full, Walmart (cause we're poor people here, dammit!) price breakdown under the recipe, cause why not?

So, anyway, this consists of minimal, cheap ingredients, and literally takes around 5 minutes to make if you have a food processor, or even a blender, in a pinch. That includes grabbing stuff from cupboards, plugging in the food processor, and opening cans and jars! (It will take longer if you mash it by hand in a stone bowl.) Dump all but oil in, process a few seconds, pulse a few more times whilst adding oil a bit at a time. Done. That's it. 

Finished hummus in food processor

 
So, without further ado, here is the recipe.


Khaos' Basic Hummus

Prep Time: 3 minutes
"Cook" Time: 2 minutes
Total Time: 5 minutes
Yield: Approximately 4 Cups
Method: Food Processor or Blender

Equipment

  • Food processor - standard blade
  • Rubber spatula to scrape every bit of goodness out
  • Serving/storage container 

Ingredients

  • 3 cups home cooked or 2 cans (15.5-16 oz, depending on brand) chickpeas (AKA garbanzo beans), liquid reserved
  • 1/2 cup bean liquid
  • 1/4 cup tahini
  • 1/4 cup extra virgin olive oil
  • 2 cloves garlic
  • Salt and freshly ground pepper to taste (or pre-ground, but meh)
  • 2-4 Tbs lemon juice
  • 1+ tsp cumin
  • 1 tsp paprika

Directions

  1. Put everything except oil in food processor & hit it until smooth. 
  2. Add olive oil a little at a time and process until desired consistency.
  3. Put in a serving/storage container and enjoy with pita, chips, veggies, or whatever else strikes your fancy! 

Notes

  • Add in any kind of extras for different flavours you desire. 
    • Roasted peppers
    • Sun dried tomatoes
    • Roasted garlic
    • Artichokes
    • Roasted eggplant
    • any kinds of peppers/chillies
  • Check out the different varieties in the stores and let your imagination run wild! 
  • To cook beans in Instant Pot: 
    • Put beans + water to 3 inches above bean level in pot. Don't fill more than 2/3 full. 
    • Pressure cook on high (default for most pots) 35 minutes and allow natural release.
    • Extra beans and liquid can be portioned and frozen for future use. 
       
    And now, for the promised price breakdown!
 

What Does a Batch Actually Cost?

Prices checked August 29, 2026. These are regular prices, not sale prices, using the least expensive practical options I found at my local Walmart unless otherwise noted.

This recipe makes approximately 4 Cups, or 32 oz, of hummus.

  • Chickpeas - Pick One

Canned:
2 cans Great Value Garbanzo Chickpeas, 15.5 oz each - $0.92 each
Cost per batch: $1.84

Dried:
Great Value Dried Chickpeas, 1 lb - $1.46
Approximately 1 Cup dried chickpeas, or about 7 oz, yields the roughly 3 Cups cooked needed for one batch.
Cost per batch: about $0.64

I particularly love how neatly that works out - one Cup dry beans becomes almost exactly the amount this recipe needs.

  • Tahini

Krinos Tahini, 16 oz - $6.47

1/4 Cup per batch
Cost per batch: about $0.86

  • Extra Virgin Olive Oil

Pompeian Robust Extra Virgin Olive Oil, 101 fl oz - $27.12

1/4 Cup, or 2 fl oz, per batch
Cost per batch: about $0.54

  • Lemon Juice

Great Value 100% Lemon Juice, 32 fl oz - $2.24

2-4 Tbs, or 1-2 fl oz, per batch
Cost per batch: about $0.07-$0.14

  • Garlic - Pick One

Fresh garlic:
Fresh garlic bulb - $0.64 each

Assuming an average of around 10 cloves per bulb, 2 cloves costs approximately:
$0.13 per batch

Dried minced garlic - in store:
McCormick Minced Garlic, 9 oz - $9.72

The generally accepted substitution, and McCormick's own recommendation, is 1/4 tsp dried minced garlic per fresh clove. Therefore, 2 cloves = 1/2 tsp dried minced garlic.

Cost per batch: about $0.04

Dried minced garlic - bulk/shipped:
Food to Live Minced Garlic, 2 lb - $14.65

Using the same 1/2 tsp, approximately 1 gram, per batch:

Cost per batch: about $0.02

  • Cumin

Great Value Ground Cumin, 2.5 oz - $1.48

1 tsp per batch
Cost per batch: about $0.04

  • Paprika

Great Value Paprika, 2.5 oz - $1.08

1 tsp per batch
Cost per batch: about $0.04

  • Salt and Pepper

Both are used to taste and the amount is tiny, so I am allowing approximately:

$0.03 per batch

Total Cost for Approximately 4 Cups / 32 oz

Depending on which chickpeas and garlic you use:

Canned chickpeas + fresh garlic: about $3.54-$3.61

Canned chickpeas + in-store dried minced garlic: about $3.45-$3.52

Canned chickpeas + bulk dried minced garlic: about $3.43-$3.50

Dried chickpeas + fresh garlic: about $2.34-$2.41

Dried chickpeas + in-store dried minced garlic: about $2.25-$2.32

Dried chickpeas + bulk dried minced garlic: about $2.23-$2.30

The range is mostly because the recipe calls for 2-4 Tbs lemon juice.

So, depending on how you make it, a full 32 oz batch of hummus costs somewhere around $2.25-$3.60.

And this is exactly why looking at the checkout price of pantry staples can be misleading. Yes, buying a jar of tahini and a giant bottle of extra virgin olive oil costs more up front. You are not using the entire jar and bottle to make one batch of hummus, and, presumably, not JUST using them for hummus either!

The actual amount of that $27.12 bottle of EVOO used here costs about 54 cents.

The actual amount of that $6.47 jar of tahini costs about 86 cents.

And that is the difference between the price of stocking a kitchen and the price of making a meal.

Thursday, 23 October 2025

A properly stocked kitchen is the first step to a well stocked larder (every day preps)

 The title of the post really says it all. 

I've been told so many times, by so many people, when talking about being prepared for whatever comes along, "I wouldn't even know where to begin!", and so I finally decided to tackle that question with a post.

So, I started to write a post about how to build a well stocked larder.

It wasn't long before I realised that I had gotten way ahead of myself. 

You can't well use the contents of even the most generously stocked larder if it is not supported by a good foundation of the essential basics.

It turns out I was coming from the starting point of presupposing that "everybody" has certain things on hand in their kitchen or pantry. 
That just isn't true anymore, and most people who are saying, "Where do I even start?", are not coming from that place.

Let's face it. Most people in modern times are not coming from that place!

More and more these days, people don't cook. Folks order takeout,  go out to eat, or eat fast food and pre-packaged meals. 
Even when most people say they "cook", what they really mean is that they take a box or a can from the shelf, or a package from the freezer, and heat it up, maybe even in the oven or on the stove. 
Or, if they are feeling really ambitious, the packaging will have different components that need to be prepared, packets added, water, or some milk and butter stirred in, or they use meal kits, that come with exact amounts of everything they need to make a single meal. 

Articles that offer dinner recipes ready in an hour or less are almost completely out of fashion, because who has time to spend more than 20 minutes, TOPS on dinner!? If you can't get it done faster than delivery can get it done, why bother?

When COVID hit, lots of folks realised just how much we, as a society, have come to rely on and take for granted being able to just stop and grab dinner on the way home every day, or otherwise have immediate and pretty much round the clock access to whatever we want, when we want it. 
When I initially started this post, a month or more into some level or another of "lockdown" for most of the Western world, and just starting to gradually ease out of such restrictions in some places, many people were tired of living on ramen and other instant foods, or maybe they just couldn't get them, because the stores were still out of them. 

Either way, more people than ever in the last couple decades or more began cooking all or most of their meals at home, and, for more than a few, it was a frightening foray deep into the unknown. 

I actually remember a time before there were microwaves - and, therefore, microwave meals, food delivery other than pizza or Chinese (and then only in  more populated areas, usually near a big city), 24-hour grocery stores, meal kits, and tons of the other things that are simply commonplace today, and most people ate dinner at home, that was cooked from scratch at home, the majority of the time, but that is "ancient history" to a lot of you. Yes, brontosaurus burgers were very tasty. Thank you for asking!

So! for the most basic, bare bones things you need to have on hand in your kitchen/pantry in order to make a meal from just about anything - or even just from those things, in times of desperation, check out this post

Once you've got that down, then come back here and learn how to take it from bare bones to properly stocked

So, you have the absolute essentials. You're not going to starve if the shit hits the fan, and you've experimented with what you happen to have on hand or what was on sale, or a few things you got for the recipes you found and made. Now what?

Now, it’s time to build out that foundation into something you can actually live with - not just survive on. This is the level where your kitchen stops being a room full of random ingredients and starts being your most powerful tool for independence.

The good news is that “properly stocked” doesn’t have to mean crammed full or expensive. It means balanced, flexible, and ready - you’ve got the essentials to make real food, most days, without needing to run to the store every time you want to cook something that didn’t come in a box.

First Step: The Universal Pantry Core

Every cuisine in the world is built on some combination of fat, acid, salt, and flavour base. You’ve already got fat and salt covered - so let’s expand that toolkit.
 

Flavour Builders

These are your everyday magic-makers. They show up in nearly every cuisine and will keep you from falling into the “beans and rice again?” blues.

  • Onions, garlic, and celery – The holy trinity of almost everything. Buy fresh when you can, but dried or frozen works fine too.
  • Broth or bouillon – Vegetable, chicken, beef. Great for soups, stews, grains, and flavouring beans. And you can make your own bone broth  or vegetable broth for free!
  • Tomato paste or canned tomatoes – Adds umami depth and tang.
  • Vinegar – White vinegar for cleaning and basic cooking, plus one or more additional types of vinegar (apple cider, wine, rice, etc.) for dressings, sauces, and more complex recipes. You can always buy just one additional kind per month, until you have all the types you want on hand, depending on the kinds of recipes you'll be making. More on that in the next food stocking post. 
  • Soy sauce and/or Worcestershire - Salt plus savoury/umami punch.
  • Mustard - Yellow for classic comfort food, Dijon for a touch of sophistication. More types as you go for branching out. 
  • Hot sauce and/or chili flakes - Pick one or two you like and use it with abandon. (Your ten-plus collection belongs in the "Well Stocked Larder" section, later.)
  • Honey, molasses, and/or maple syrup - Sweeten, glaze, and balance acidic or spicy dishes.
  • Lemon juice or bottled citrus - Brightens almost anything.

  • A handful of versatile dried herbs and spices:
  • Black pepper
  • Paprika (sweet or smoked)
  • Oregano or Italian blend
  • Basil or thyme
  • Cumin
  • Cinnamon


If you’ve got those, you can create just about any flavour profile with a few tweaks.

Proteins That Stretch

Protein keeps you full and powers all the repair work your body does, but it doesn’t have to mean expensive cuts of meat. Mix shelf-stable and fresh options for balance:

  • Eggs – Fresh, or powdered for backup.
  • Fresh or frozen cuts on sale or in bulk – Especially stuff marked down for quick sale! Remember, you can freeze portions that you won't use right away. This is where a vacuum sealer really comes in handy. 
  • Canned tuna, chicken, or salmon – Quick proteins with long shelf life.
  • Lentils – They cook fast, keep forever, and can go from soup to curry.
  • Beans (dry or canned) – You’ve already got these, but variety helps.
  • Nut butters – Energy, fat, and protein in one spoonful.
  • Cured or shelf-stable meats – Bacon bits, spam, corned beef, pepperoni.


Grains & Starches

Flour, oats, and rice are the backbone; now let’s give them some friends.

  • Pasta – In all its glorious forms.
  • Cornmeal or polenta – Fried mush, cornbread, grits - all comfort.
  • Breadcrumbs or panko – Stretch meat, coat fried foods, thicken stews.
  • Potatoes – Fresh, powdered, or dehydrated flakes.
  • Tortillas, crackers, or shelf-stable wraps – Fast carb delivery systems.
  • Dry cereals (hot and cold ones) - But rather than buying the pre-made "9 grain hot cereal" and similar mixes, make your own, on the cheap, by adding other grains and seeds to your oats. Recipes coming soon(ish), and will be linked here. 


Vegetables & Fruit

Variety is both nutrition and morale. Keep a mix of fresh, frozen, and shelf-stable on hand.

  • Frozen mixed veggies – Don’t knock them. Perfect for soups, pot pies, and stir-fries.
  • Canned goods – Tomatoes, corn, peas, carrots, green beans, fruit.
  • Dried veg mix – Great for soups and emergencies.
  • Root vegetables – Onions, carrots, garlic, potatoes - they last ages if stored right.
  • Dried fruit or fruit cups – Sweet snacks and baking boosters.


Dairy & Alternatives

You don’t need a dairy aisle in your fridge, just the key players.

  • Fresh, powdered and/or evaporated milk – For sauces, baking, and tea (or coffee, in a pinch, if you don't have half and half, or are a savage, heathen.. err, I mean, not a coffee snob).
  • Cheeses – Whatever variety(ies) you will be using most, in blocks and/or shredded. Both freeze well. I recommend buying in bulk and separating into 1/2 lb to 1 lb blocks/bags. Vacuum seal the smaller blocks, and store the shredded in quart freezer bags with all the air squeezed out. Don't forget to label things clearly!
  • Butter and/or ghee – Adds flavour and stability.
  • Plant milks (if applicable) – Almond, soy, oat, whatever fits your diet.


Tools & Kitchen Consumables

Your food is only as useful as your ability to cook it. If you’re missing a few basics, pick them up second-hand or one at a time.

  • Baking sheet & casserole dish
  • Frying pans, saucepans, and at least one really large (5 qt or more) pot or Dutch Oven - Cast iron is extremely versatile, can be used directly in/on open flame, and will last multiple generations with a little TLC. 
  • Mixing bowls
  • Measuring cups/spoons
  • Wooden spoon 
  • Cooking spatula (AKA pancake turner) 
  • Rubber spatula
  • Whisk
  • Strainer/colander
  • Foil
  • Parchment paper
  • Plastic wrap
  • Storage containers or reusable freezer bags


Next Step: Add Your Own Flavour

Once your basics are set, then you can start flavour-branching. These are small, high-impact tweaks that steer your kitchen toward your favourite cuisines without cluttering your shelves. 

Start with one region or comfort zone and expand naturally. If your spice shelf starts to look like it’s holding a UN summit, congratulations - you’re doing something right!

Here are some examples...

Italian / Mediterranean

  • Olive oil
  • Balsamic vinegar
  • Oregano
  • Garlic
  • Pasta
  • Canned tomatoes

Mexican / Latin

  • Cumin
  • Chili powder
  • Beans
  • Rice
  • Tortillas
  • Salsa

Asian

  • Soy sauce
  • Sesame oil
  • Lime juice 
  • Rice vinegar
  • Ginger
  • Garlic
  • Rice noodles
  • Sriracha sauce 

American Comfort Foods

  • Ketchup
  • Mustard
  • Gravy mixes
  • BBQ sauce
  • Bouillon


Remember - Build It Slowly

The biggest mistake people make is trying to “complete” a kitchen in one shopping trip. 

Don’t.

Add one or two new things each week - maybe a spice, a different type of beans, a bag of another rice variety.
Tape a “use-and-replenish” list inside a cupboard door. If you use the last of something, or, better yet, if it's getting low, it goes on that list immediately.

The goal is to cook regularly from what you store and store what you actually cook. That’s how your kitchen stays both thrifty and reliable - no more mystery cans from the apocalypse of 2008!

Next Stop: The Larder

At this point, you’ve moved from bare survival to functional, flexible living. You can make a real variety of meals, feed others, and handle a few weeks of disruption without stress.

In the next post of this mini-series, we’ll move on to the well stocked larder - where things start getting deep, literally and figuratively. That’s where we talk about bulk buying, rotation systems, long-term storage, and yes - the luxury of ten mustards, twelve vinegars, and a hot sauce for every mood. That next post will be linked here as soon as it goes live. 

Because preparedness isn’t about hoarding; it’s about Freedom!
 

Monday, 20 October 2025

Recipe ~ Instant Pot Borscht ~ Comfort, Colour, and a Bowlful of History

As always, if you just want the recipe without the story behind it, click here,.

There’s a reason borscht has survived centuries and borders: it’s not just a soup — it’s a ritual in red. Earthy beets lend their jewel-toned magic, beef bones infuse the broth with richness, and the tang of lemon ties it all together in a single, steaming spoonful that feels like home, no matter where you’re from.

The rest of the bone broth waiting to go in the pot

This version honours that old-world heart while embracing the speed of modern life. The Instant Pot turns what once demanded an entire afternoon of simmering into a meal that comes together in just about an hour and forty minutes, start to finish - tender beef, sweet-savoury vegetables, and that unmistakable crimson glow that makes the kitchen smell like nostalgia itself.

I first tasted borscht at a large camping event back in the early 2000s, and it was so delicious that I just had to have the recipe. So I did what any food-obsessed camper would do — I begged very prettily, full on, shameless, big, brown puppy eyes engaged, until the chef caved.

What I got was a 300-serving recipe, complete with measurements in grams and litres, written in that mysterious shorthand of professional cooks who assume everyone owns a compact car sized cauldron and a crew. From there, the challenge was scaling it down to a non-insane, household version and translating everything into regular, USA-style kitchen logic.

This involved more math than any meal deserves, but I wanted that, exact borscht - not a simplified version, not a “close enough.” So I sat down and did the math (with lots of help from Google and conversion calculators!), scaling everything down precisely before buying a single ingredient. The first time I made it, it was exactly as I remembered it from the event.


For years after, I made it the traditional way: slow, aromatic, and all-consuming — the kind of recipe that fogs up all the windows, and makes the house smell like comfort itself. I made a few tweaks to the recipe over the years, to make it more to my exact tastes, budget, and to make it a little healthier (and even more delicious, IMO!) too. It was worth it every time, but let’s be honest - a meal that takes all day to coax into perfection isn’t exactly weeknight-friendly.


Enter the Instant Pot. With a few order of operations and timing adjustments, I finally managed to capture that same deep, ruby richness without sacrificing an entire afternoon to the stove gods. It’s the same flavour I fell in love with, just with modern magic doing the heavy lifting, and allowing just enough time to shape, rise, bake, and cool
 a nice loaf of crusty, slow fermented, no knead bread to serve alongside every bowl. (That recipe will be coming soon!)


So here it is: the evolution of my borscht. Same flavour, less waiting — because life’s too short to stand watch over a pot all day… unless you want to.

Serve it the traditional way, with a dollop of sour cream or thick Greek yogurt and a scatter of fresh dill, and you’ll swear it’s been cooking since sunrise.
(But your Instant Pot and I will know the truth.)


Instant Pot Borscht

Prep Time: 30 minutes
Cook Time: 1 Hour, 10 minutes
Total Time: 1 Hour, 40 minutes
(Cook time includes IP coming to pressure and release time)
Yield: 6-10servings
Method: Instant Pot

Equipment

  • Instant Pot or other pressure cooker.

Ingredients

  • ~3 lbs Bone in beef shank (can sub bone in beef chuck, beef short ribs, or oxtail)
  • 2-3 Tbs extra virgin olive oil
  • 1-2 Med-Lg onions, chopped or sliced
  • salt & pepper for meat 
  • 1 tsp paprika
  • 5 Cups beef stock or bone broth
  • 0.5 lb carrots, chopped or sliced
  • 3-4 stalks celery, chopped
  • 1/2 Med head red cabbage, chopped or shredded
  • 1 lb beets (about 4 cups), chopped or sliced
  • 2 15oz cans diced tomatoes
  • 3 tsp lemon juice
  • 3 tsp white sugar
  • 2-4 large potatoes, sliced or large diced (optional)
  • Sour cream or Greek yogurt for garnish/to mix in
  • fresh dill for garnish (optional)

Directions

  1. Salt and pepper both sides of meat well.
  2. Brown meat & onion with paprika in oil on sauté. 
  3. Remove meat from pot.
  4. Add broth & deglaze pot w/wooden spoon.
  5. Return meat + remaining beef stock to pot.
  6. Set for 30 minutes on high pressure, and allow 15 mins natural release. 
  7. Remove meat again, add remaining ingredients except lemon juice to broth & set for 5 minutes w/quick release.
  8. While veg is cooking, cut/shred beef into bite sized chunks.
  9. Return beef to pot along with lemon juice and stir well.
  10. Serve with a dollop of sour cream or Greek yogurt in each bowl.
  11. Yum yum!!

Notes

  • Using homemade bone broth instead of instant significantly improves the depth and richness of flavour!!
  • This goes very well with slabs of rustic, crusty, buttered bread!
  • This can be made vegan or vegetarian by omitting the meat and sour cream, and just using vegetable broth. 

Monday, 6 October 2025

Recipe ~ Ram Copycat Beer Cheese Soup (Instant Pot, Slow Cooker, or Stovetop)


As always, if you just want the recipe, without the story behind it, click here.
 
October "officially" kicks off soup season, especially thick and hearty soups to ward off the fall chills, and since I've already posted my Oktoberfest Ale Potato Cheese Soup, which I've already made twice in the last couple weeks, I figured I'd post the one that was actually the impetuous for that one - My Ram Copycat Beer Cheese Soup. 
 

 This is a seasonal soup they serve, and it has changed somewhat over the years, from what I can glean on archived versions of their website, but this is the one that was my personal favourite, from sometime in the 2010s, that used their Buttface Amber Ale, and was chock full of rich, creamy cheeses, bacon, ham, celery, and carrots. 
I am sure that my version is not exactly the same as theirs. Their recipe is proprietary, and, unlike many restaurant recipes, theirs seem to remain pretty solidly locked down. That doesn't stop dedicated cooks who happen to be super-tasters/smellers from coming up with the closest thing possible, though, and what I came up with, after lots of research on the ingredients that I COULD confirm being in their recipe (one ingredient search at a time, and a very tedious process, but worth it!), was pretty damn close! Definitely close enough to skip the trip to the restaurant and have it at home most of the time. 
 
Whether you've had the pleasure of enjoying the Ram's beer cheese soup or not, I guarantee this is a delight for the taste-buds! The only problem is being too full when you still want to eat more of it. 

Ram Copycat Beer Cheese Soup


(Times based on Instant Pot Method. Other methods take longer)
Prep Time: 20 minutes
Cook Time: 30 minutes
Total Time: 40 minutes
Yield: 6-8 servings


Ingredients: 

  •     1/2 lb bacon, diced (ends and pieces or thick sliced is best)
  •     1/2 lb ham, cubed, bite sized (can sub additional 1/2 lb bacon)
  •     2 large white or yellow onions, chopped or sliced
  •     2 Tbs minced garlic
  •     1 Cup carrots, finely chopped
  •     1 Cup celery, finely chopped
  •     8 Tbs butter (1 stick)
  •     1/4 tsp salt, or to taste
  •     1/4 tsp cayenne
  •     1/2 tsp+ fresh ground pepper medley, (or black pepper) - to taste
  •     1/4 tsp ground nutmeg
  •     1/2 Cup all-purpose flour
  •     1 tsp dry mustard powder
  •     12-24 oz Ram's Buttface Amber Ale, or another, similar amber ale (Like Alaskan)
  •     2 Cups half-and-half
  •     2 Tbs Worcestershire sauce
  •     ~4-6 Cups chicken broth (bone broth is best, and you can make it for almost free!)
  •     1 Tbs Dijon mustard
  •     16 oz sharp cheddar cheese, shredded
  •     8 oz Colby & Monterey jack cheese, shredded (can sub jack, mozzarella, Havarti, muenster, or white American)
  •     4 oz cream cheese, cubed or sliced for even incorporation
  •     8 oz sour cream or plain, Greek yogurt

Directions: 

  • Heat a large pot or Dutch oven (Or skillet, for Slow Cooker) over med-high heat, or set the Instant Pot to "Sauté", add bacon, and cook until almost crisp. 
  •     Add the butter to the pot.
  •     When butter has mostly melted, add the ham, onion, carrots, and celery, and sauté for 5–7 minutes, or until the vegetables are softened.
  •     Add the minced garlic, dry mustard, cayenne pepper, salt, pepper, and nutmeg and cook for 1 more minute until fragrant. 
  •     Sprinkle the flour over the cooked vegetables, and stir constantly for 1–2 minutes to create a light roux. 
  •     Slowly whisk in the ale, making sure to scrape up any browned bits from the bottom of the pot.
    • If USING SLOW COOKER: Transfer contents of skillet to slow cooker, stir in all remaining ingredients except cheeses and sour cream/yogurt, and cook on high 4 hours or low 8 hours, stirring in cheeses and sour cream/yogurt in the last 20 minutes of cooking, and serve when it's all mixed in smoothly. Otherwise...
  •  Stir in broth and Worcestershire sauce.   
    • IF USING INSTANT POT: lock & seal lid, and cook on "Manual" or "Pressure Cook" for 4–5 minutes, with a natural release, and skip to the last step. Otherwise...
  • Reduce heat to med-low and gradually stir in half & half, then simmer 10–15 minutes, until thickened slightly.
  • Reduce the heat to low, add Dijon, and gradually stir in cheeses, stirring continuously until the cheese is completely melted and the soup is smooth.         
    •  IF USING INSTANT POT: After quick release, open lid, add half & half, Dijon, and gradually stir in cheeses and sour cream/yogurt, stirring continuously until the cheese is completely melted and the soup is smooth.
  • Garnish With:

    •     Crispy bacon bits
    •     Shredded cheese(s)
    •     Chopped green onions (scallions) 
    •     Parsley
    •     Popped popcorn (apparently, that is a thing)
    •     Whatever else sounds good! 

Notes: 

  • Do not let the soup boil after adding the cheese! It will separate and the texture will be grainy/curdled.

Monday, 29 September 2025

Recipe ~ Cheater Instant Pot Spaghetti


As always, if you just want the recipe, without the story behind it, click here.


My regular, Instant Pot Spaghetti recipe is definitely WAY better than this, but we all know that sometimes, we just need something really fast and easy, and this spaghetti hits all the comfort food buttons in short order along with the quick and easy ones. 


 I, again, borrowed from the bare bones IP spaghetti recipe I found online elsewhere for this, but it is still more involved than that one. 
You can just omit the  majority of the ingredients, other than the pasta, sauce, and water, and it will basically be that other recipe, and will be a passable quick meal, but so would just having a pack of ramen with a few spare condiment packs stirred in. 
 
The added ingredients only add an extra 5-10 minutes, and make SUCH a difference in the final product, that I feel like it's worth it every time. 
 
Also, like most on this site, this recipe is for a BIG batch, that either feeds a lot of people with 6-8 LARGE servings (as in, there aren't side dishes in the meal - it IS the meal), or has leftovers to eat later, whether that means you're having it for every meal until it's gone, or portioning, packaging, and freezing for next time you need something even MORE quick and easy, like a freezer meal. 


Cheater Instant Pot Spaghetti

Prep Time: 5 minutes
Cook Time: 10 minutes
Total Time: 15-25 minutes (including time to come to pressure & natural release time)
Yield: 6-8 servings

Equipment:

  •  Instant Pot or other electric pressure cooker

Ingredients: 

    • 2 lbs Ground Beef, Meatballs, Italian sausage, or other meat (can reduce for cost or health)
    • 1-2 Tbs minced garlic (OR 2 tsp garlic powder for faster & easier)
    • 2 med onions, chopped, diced, or sliced, as preferred (OR 2 tsp onion powder for faster & easier) 
    • 1 Tbs Italian Seasoning (to taste)
    • 2 Pound Spaghetti Noodles
    • 2 (48 Ounce) Jars Spaghetti Sauce
    • 1.5 Jars Water 
    • 2 (29 Ounce) Cans Diced Tomatoes or tomato sauce

Directions: 

    • Set IP to sauté and add ground beef.   
    • Add garlic, onion and Italian seasoning.   
    • Cook, breaking meat up until browned & onions (if using) are tender.  
    • Break spaghetti in half and place on top of meat.   
    • Pour in spaghetti sauce, tomato, and water, ensuring pasta is completely covered in liquid. 
    • Seal and cook on high pressure for 6 minutes w/natural release 
    • Stir well & serve

Notes:

Monday, 22 September 2025

Recipe ~ Instant Pot Spaghetti


As always, if you just want the recipe, without the story behind it, click here.

This is basically just my regular spaghetti sauce recipe, but with instructions for including the pasta right in the pot instead of cooking it separately in a different pot. The only differences are the pasta in the pot and the addition of extra water.


 I had previously found a recipe elsewhere for Instant Pot spaghetti, but I only really was going for the information I needed for time and additional liquid, cause the recipe itself was just straight up jarred sauce and pasta, which, IMO, doesn't really qualify as a recipe at all, but rather, a method. Anyway, I took into account the fact that the sauce would already be hot, and adjusted the cook time and liquid addition accordingly, and that's it. But I figured I'd post it anyway, since it's Spaghetti September and all. (Yes, I'm still going with that. I won't stop. I will make it a thing.)
 

So, without further ado, I present to you... 

Instant Pot Spaghetti


Prep Time: 10 minutes
Cook Time: 20-30 minutes
Total Time: 30-40 minutes (including time to come to pressure & natural release time)

Equipment:

  •  Instant Pot or other electric pressure cooker

 Ingredients: 

  • 2 lbs Ground Beef, Meatballs, Italian sausage, or other meat (can reduce for cost or health)
  • 1-3 Tbs Olive Oil
  • 2 Lg Yellow Onions, Diced
  • 2 green bell peppers, seeded & diced
  • 6 cloves garlic, minced
  • 1/4 lb or so carrots, chopped (or minced, it you want to hide them)
  • 3-4 Lg stalks celery, roughly chopped
  • about 8oz sliced mushrooms of desired type (fresh or canned-drained) 
  • 1 Cup white wine (can sub red/merlot) 
  • 2 cans (28oz) diced or stewed tomatoes (or 4 14oz)
  • 1 can (14oz) crushed/pureed tomatoes
  • 1 can (4oz) tomato paste
  • 16-24oz good store-bought or homemade marinara sauce
  • 1 Tbs Italian seasoning
  • 2-4 plums, figs, or dates (fresh or dried), chopped, diced, or pureed (Or sub 2 Tbs sugar)
  • 2 tsp sea salt
  • 1/2 teaspoon crushed red pepper (optional)
  • 1/4 Cup finely minced fresh parsley (or 3 Tbs parsley flakes), more to taste
  • 1 whole rind from one wedge parmesan (optional)
  • 1/2 Cup grated parmesan cheese (optional)    
  • 4 Cups water or broth
  • 1 lb spaghetti pasta, broken in half 


Directions: 

  • Set to sauté, add meat to pot and start to brown, breaking up into smaller pieces if ground.
  • Add garlic onion, peppers, and seasonings, and continue sautéing, stirring regularly, until onion starts to turn translucent, adding olive oil if needed to prevent sticking (not usually needed with leaner meats).
  • Add additional veggies and cook for another 3-5 minutes.     
  • Deglaze pot with wine allowing it to boil and reduce for about 1 minute.
  • Add tomatoes, paste, sauce, plums/figs/dates/sugar, parsley, Parmesan grated + rind and crushed red pepper (if using), and stir well.
  • Seal and cook on high pressure for 20-30 minutes w/natural release, or 30-35 minutes w/quick release.
  • Remove lid, add broth/water, stirring down to bottom of pot as well as able.
  • Add pasta to pot in a criss-cross pattern, ensuring it is completely covered in liquid by pushing down with spoon or ladle. 
  • Seal and cook on high pressure for 6 minutes w/natural release 
  • Stir well & serve

Monday, 1 September 2025

Recipe ~ Majorly Mouthwatering Marinara (Instant Pot, Slow Cooker, or Stovetop)


As always, if you just want the recipe, without the story behind it, click here.

This big batch marinara can be made in the Instant Pot (or similar), slow cooker, or the stove top, and there are specific instructions for each. A food processor will come in very handy, but isn't absolutely necessary. It's such a big batch because it is a bit time consuming, and, trust me - you're going to want to have more on hand that just one meal's worth! So, have airtight, freezer safe containers on hand to store for later, and/or gift to others. Or, if you're really not into the make ahead thing at all or have zero freezer space, you can scale the recipe down. 
  
I resisted the urge to label this, "The BEST Marinara", because that's already been done multiple times, and that is subjective anyway. 
 
 That said, this recipe was created by testing many of "the best" recipes out there, from handed down family recipes, to restaurants, famous cooking shows, food networks, and food websites, to find the best of the best, then combining elements, methods, and ingredients to come up with a marinara that isn't missing anything, is well balanced, aromatic, the perfect texture, and truly embodies the classic, Italian, family recipes, melded with modern, fine dining experiences. My taste buds and test kitchen tasters say I nailed it, but don't take our word for it! Give it a shot and decide for yourself!


 The amount of olive oil may seem excessive, but it's really not. The additional olive oil - and be sure to use good quality, extra virgin olive oil -  improves the texture and gives it that "secret ingredient" level taste punch than may lesser recipes lack. 
 
If you're looking for a much quicker and easier, but still delicious marinara, check out my recipe for quick and easy marinara (releasing 2025.09.29, so the link won't work 'til then). If you're ready to put in the effort for the explosion of flavours, texture, and nuance of the genuine article, follow the instructions below, and prepare your palate for a delectable delight!  


Khaos' Marinara

Equipment:

  • large Dutch oven (for stove top), heavy bottom skillet (for slow cooker), or an Instant Pot (or other electric pressure cooker).
  • Food processor, blender, or potato masher type tool and large mixing bowl.

Ingredients: 

    • 1/4 Cup extra virgin olive oil 
    • 8-10 cloves garlic, minced
    • 2 (28oz) cans crushed/pureed tomatoes
    • 1(6 oz) can tomato paste
    • 1/2 Cup or a little more Merlot (or other dry, red wine)
    • 1/4 Cup fresh basil, finely chopped
    • 2 Tbs fresh oregano, finely chopped
    • 2 tsp fresh thyme, finely chopped
    • 2 tsp fresh rosemary, finely chopped
    • 1 tsp fresh marjoram, finely chopped
    • 1-2 Tbs fresh parsley, finely chopped
        (You can sub the fresh herbs for 2 Tbs Italian seasoning, or individual dried herbs - just use 1/3 the amount of dried, and make sure there is parsley in the seasoning mix, or add your own)

    • 1/2 tsp sea salt
    • 1/2-2 tsp fresh ground black pepper or medley (optional)
    • 1 tsp sugar

Directions: 

  •  Pour tomatoes into bowl of food processor or blender, and puree until smooth, OR place in a large bowl and use hands and/or a masher to crush tomatoes until no large chunks remain and are as smooth as possible.
  • Heat olive oil in a large Dutch oven (for stove top), heavy bottom skillet (for slow cooker) over medium-low heat - or the inner liner of the Instant Pot on sauté until shimmering. 
  • Add garlic and cook for 1 minute.
  • Add red pepper flakes (if using) and cook, stirring occasionally, until the garlic is golden-brown and fragrant, 1 to 2 minutes.
  • Add tomato paste, and cook stirring often, until the paste is darker in color and fragrant, about 2-3 minutes.
  • Add wine and deglaze pan, making sure nothing is left sticking to the pan, and allow to reduce for a minute or so.
    • IF USING SLOW COOKER: Dump contents of skillet and all remaining ingredients into slow cooker, cook on high 4-6 hours, or low 6-12 hours, and skip to last step. Otherwise...
  • Add remaining ingredients and bring to simmer.
    • IF USING INSTANT POT: Seal lid and cook at high pressure for 30 minutes with a natural release, and skip to last step. Otherwise...
  • Reduce heat to continue a gentle simmer, and cook, stirring occasionally, for an hour or two, until no longer acidic tasting and flavours are fully melded. 
  • Serve over whatever sounds good, and portion the rest into 8-16 oz airtight containers for later. 

 Notes: 

  • Can be stored in the fridge for a week or two, regular freezer up to 6 months, if airtight, and deep freezer indefinitely. (will still be safe to eat indefinitely in regular freezer, but taste and texture may change slightly) Vacuum seal containers before freezing for maximum freshness.    

Tuesday, 13 July 2021

Clean your fridge weekly for free meals! (Thrifty Kitchen Tips)


Mondays are my day each week to clean out the fridge and "root cellar, (a hanging basket of onions and potatoes in the kitchen, and box in the unheated room off the kitchen for squash, gourds, and similar), so that is also when I tend to do a lot of meal planning for the week. Basically, the idea is to unearth and rescue anything that is on its last legs or soon will be, and make sure it gets used up before it goes bad. And, of course, to throw out anything that has already gone bad, but when you keep up with the task, almost nothing ever goes bad or to waste!

This is also a great way to ease into cooking ahead, which is a pretty popular thing right now, and a really good way to save time and money in the long run.

I have fallen down on the job the last couple weeks, only sort of half-assing it, but thankfully, nothing had to be tossed! That said, there was a LOT of stuff needing to be used fairly promptly. 
 

So, what did I pull out of the fridge and other places on the Monday in question?
A couple of sad, lonely, little onions and one rotten one, most of a good onion from the fridge, a bunch of soft potatoes, almost a pound of decidedly flaccid carrots, two partial bunches of flat out floppy celery, three pounds of beets that I kept meaning to roast and kept forgetting for like two weeks, Some old garlic, about 1/3 of a head of cauliflower - not enough to really use on its own...

... a somewhat hardened wheel of Brie, what was left of a big bag of walnuts, most of a bottle of injectable marinade stuff - well past the pull date, but still smelled good, the dregs of an ancient bottle of Italian salad dressing, and a 2 lb package of bacon that was forgotten (I usually vac seal them into 1/4 - 1/2 lb packs and freeze them).


Time to start planning and prepping. 

Added to  a couple eggs, a pack of frozen chicken thighs, some harvested herbs from pruning my plants, and some contributions from my spice shelf, this will be breakfast for one day, and lunches and dinners for two or three days, depending on how hungry folks are.


The rotten onion bulb had almost nothing salvageable, but the newly grown scallions would make a nice addition to a breakfast, veggie scramble!


 Who would think those lovely, sliced scallions came from something rotten?


 That Brie is definitely old and a lot more dry than Brie is typically enjoyed, but it still tastes great, and will be even better incorporated into a couple of dishes.

Time to get cooking!

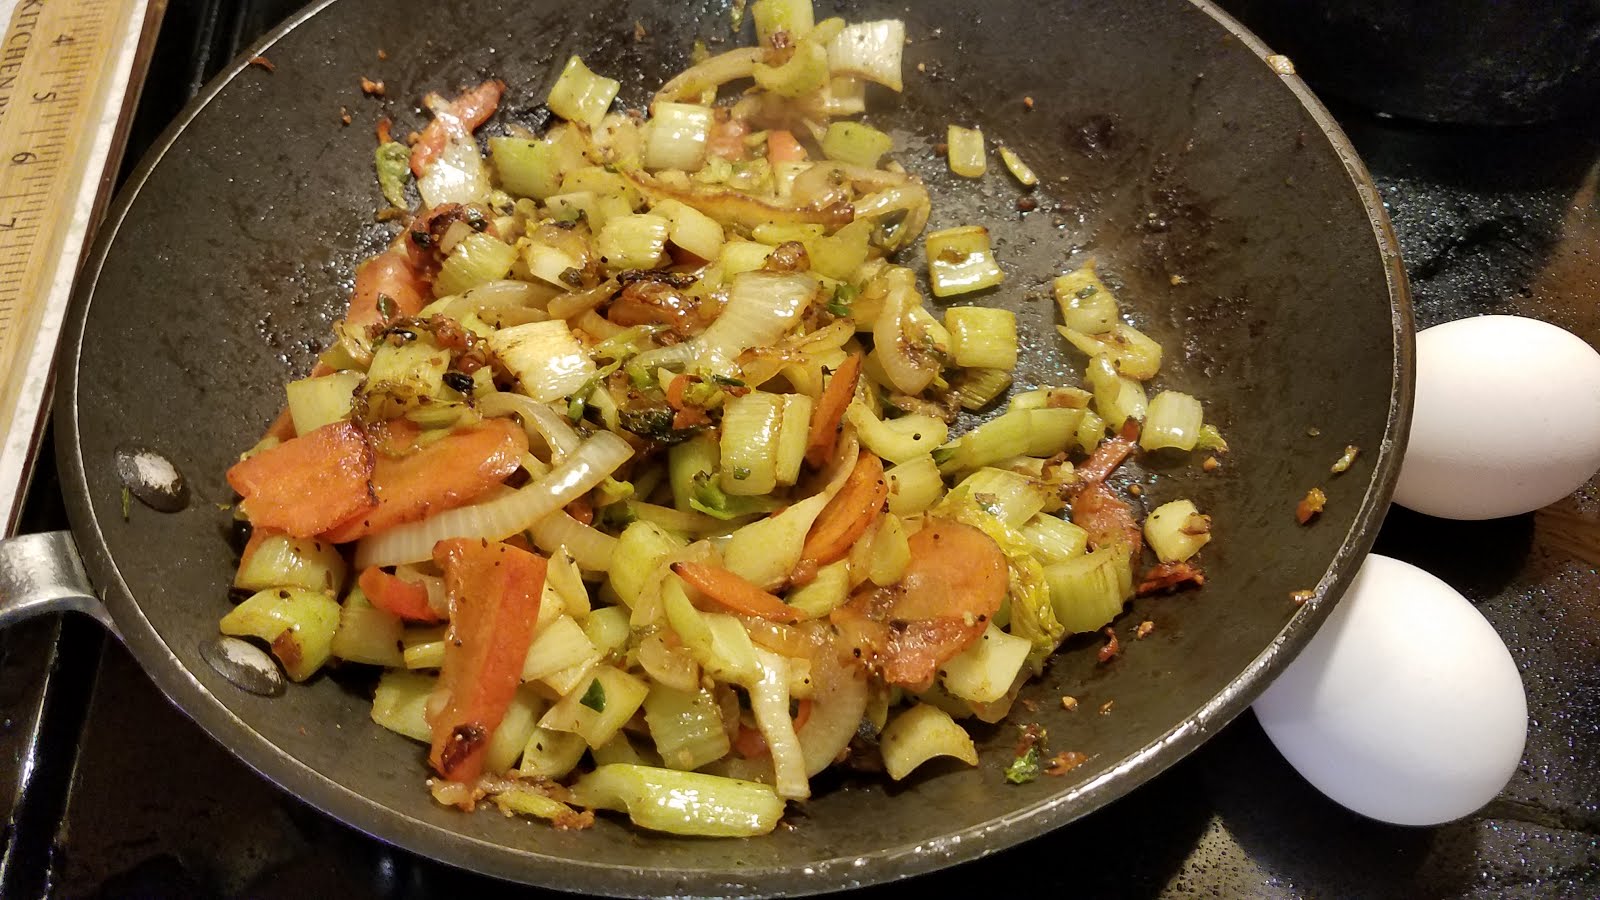
Sautéing onion, celery, carrots, and garlic for the scramble
Almost time to add in the eggs.

 Once the veggies are tender and slightly browned, a couple eggs are scrambled in. Meanwhile, most of the bacon was chopped up to cook, and will be added to other things, but I saved some slices out just for breakfast.


  The pieces are irregular cause I always get the big packs of bacon ends and pieces. It's a fraction of the price per lb, almost always thick sliced, with more meat to fat than the regular packages, and an awesome deal! Ask your local grocer where to find the ends and pieces. They are often not with the rest of the packaged bacon.  


 And that HUGE serving there is mostly veggies, with just over one egg and a little bit of Brie in the entire bowl (plus the bacon, of course), so can be enjoyed knowing it's a balanced meal.  
Now, with a good breakfast served and eaten, the rest of the future meals can be planned, assembled, and any cooking ahead done.

  Next up, a delicious roasted root veggie dish using the potatoes, beets, cauliflower, walnuts, the rest of the Brie, onion, carrots and celery, some of the garlic and harvested herbs, olive oil, and a few spices.


It could be a side dish or a main dish. We used portions of it for both over several days. 
 
Then, the salad dressing and injectable marinade, with the rest of the garlic and herbs made a delicious marinade for chicken, and then an equally delicious pan sauce to drizzle over said chicken after grilling.


I served that up with freshly harvested green salads from my indoor lettuce garden for one meal, and with the roasted veggie thing on the side for the next meal. Decadent! 
And almost all with stuff that was in danger of getting thrown out!

What can your weekly fridge and pantry cleaning haul yield for your next scrumptious meals?