Showing posts with label Cooking with fire. Show all posts

Thursday, 29 May 2025

Smokeless Fire Pit on a SERIOUS Budget AND Disabled Friendly Build

This is an account of how I built my really snazzy looking (IMO), smokeless, turbo air charged (OK, not turbo, but you can clearly hear the air rushing in! It's super cool! Err.. Hot, actually) fire pit, mostly sitting down, for about $110.00 +tax. 

First of all, I read a lot of instructionals, and watched even more videos on the topic of DIYing a smokeless fire pit. There were lots of good builds, good ideas, and aspects of various ones that I liked. Most of them were either out of my budget range, and/or required a level of labour that I can no longer do, nor afford to pay for, and a crazy amount of them assumed that "on a budget" means under $1000, or even "really cheap" builds for $300 -$500. 

The ones that were in the under $150 range were mostly ones made from repurposed junk and salvaged materials that were not the aesthetic I wanted, or they required the manual labour to locate, pick up, haul, load, and unload salvaged materials myself, which I'm just not able to do. As mentioned elsewhere in this blog, and known to many of y'all, I am disabled. My walking and standing time are seriously limited, and any serious lifting and working must be done seated. So, I needed something I could afford on a fixed income, DYI-able within my abilities and with very limited help, that still looked attractive, fit with the natural theme I wanted, and was easily usable for me as well. 

I've never been one to give up once I decide I want to make something happen, so, next came the adapt, improvise, and overcome phase! I figured out what elements were really important for what I wanted, and what was just extra work for bragging rights.

I was able to do the majority of the work seated. I did have some help with bringing me stuff, but I also could have used my scooter and my Gorilla dumping wagon (These things are AWESOME, BTW) to do the hauling stuff myself. It just would have added a bit more time to the job. That said, that would be true even if I were fully able bodied, so no net difference. 

I applied for a Dom Depot (AKA Home Depot. LOL) credit card, and got fifty bucks off the whole haul, plus free delivery, which helped a lot! You can get most of the supplies cheaper at Wally World, but with the $50 off, this was cheaper for me. Here's what I ended up with...


Supplies

Retaining wall blocks x34 ($81.00)

The main structure of the fire pit, obviously. Cheaper stones than these can be had, to make your overall project even more budget friendly, but I really liked these a lot, and they fit within my under $150 cap.


Sand ($7.59) (Available at WalMart for cheaper)

Insulates, to keep fire and heat contained, absorbs and helps distribute heat evenly, supports and helps even out the base stones, absorbs moisture, to help with drainage. 

Pea Gravel ($6.25) (Available at WalMart for cheaper)

Helps with drainage, heat distribution, and air flow. 

Lava rock ($14.29) (Available at WalMart for cheaper and a bigger bag)
Retains heat, to keep the fire pit hotter, longer, absorbs and helps distribute heat evenly, provides additional air flow for hotter and cleaner burning, and drainage.

Instructions

• Lay ring of 12 stones
• Mark around outside & move stones out of the way. 
• Dig out the marked circle 2-3 inches deep.


• Lay sand & level - Dump the bag out in the circle and spread it out with a rake or something. A metal rake like the one shown is best for this, IMO. 


• Replace the 12 stones, using sand underneath to level them as needed. 
• Remove 4 stones opposite one another (make sure remaining stones stay put!)


• Lay 2nd two levels, staggering stones for each layer.

• Optional, but recommended - Place two stones inside, to support wood for fire building and/or for supporting cooking grate. Having the stones there to prop a couple logs on over your tinder and kindling REALLY improves fast and easy fire starting! It will up your fire game for real. 

• Add pea gravel and level. 


• Add lava rock and level.
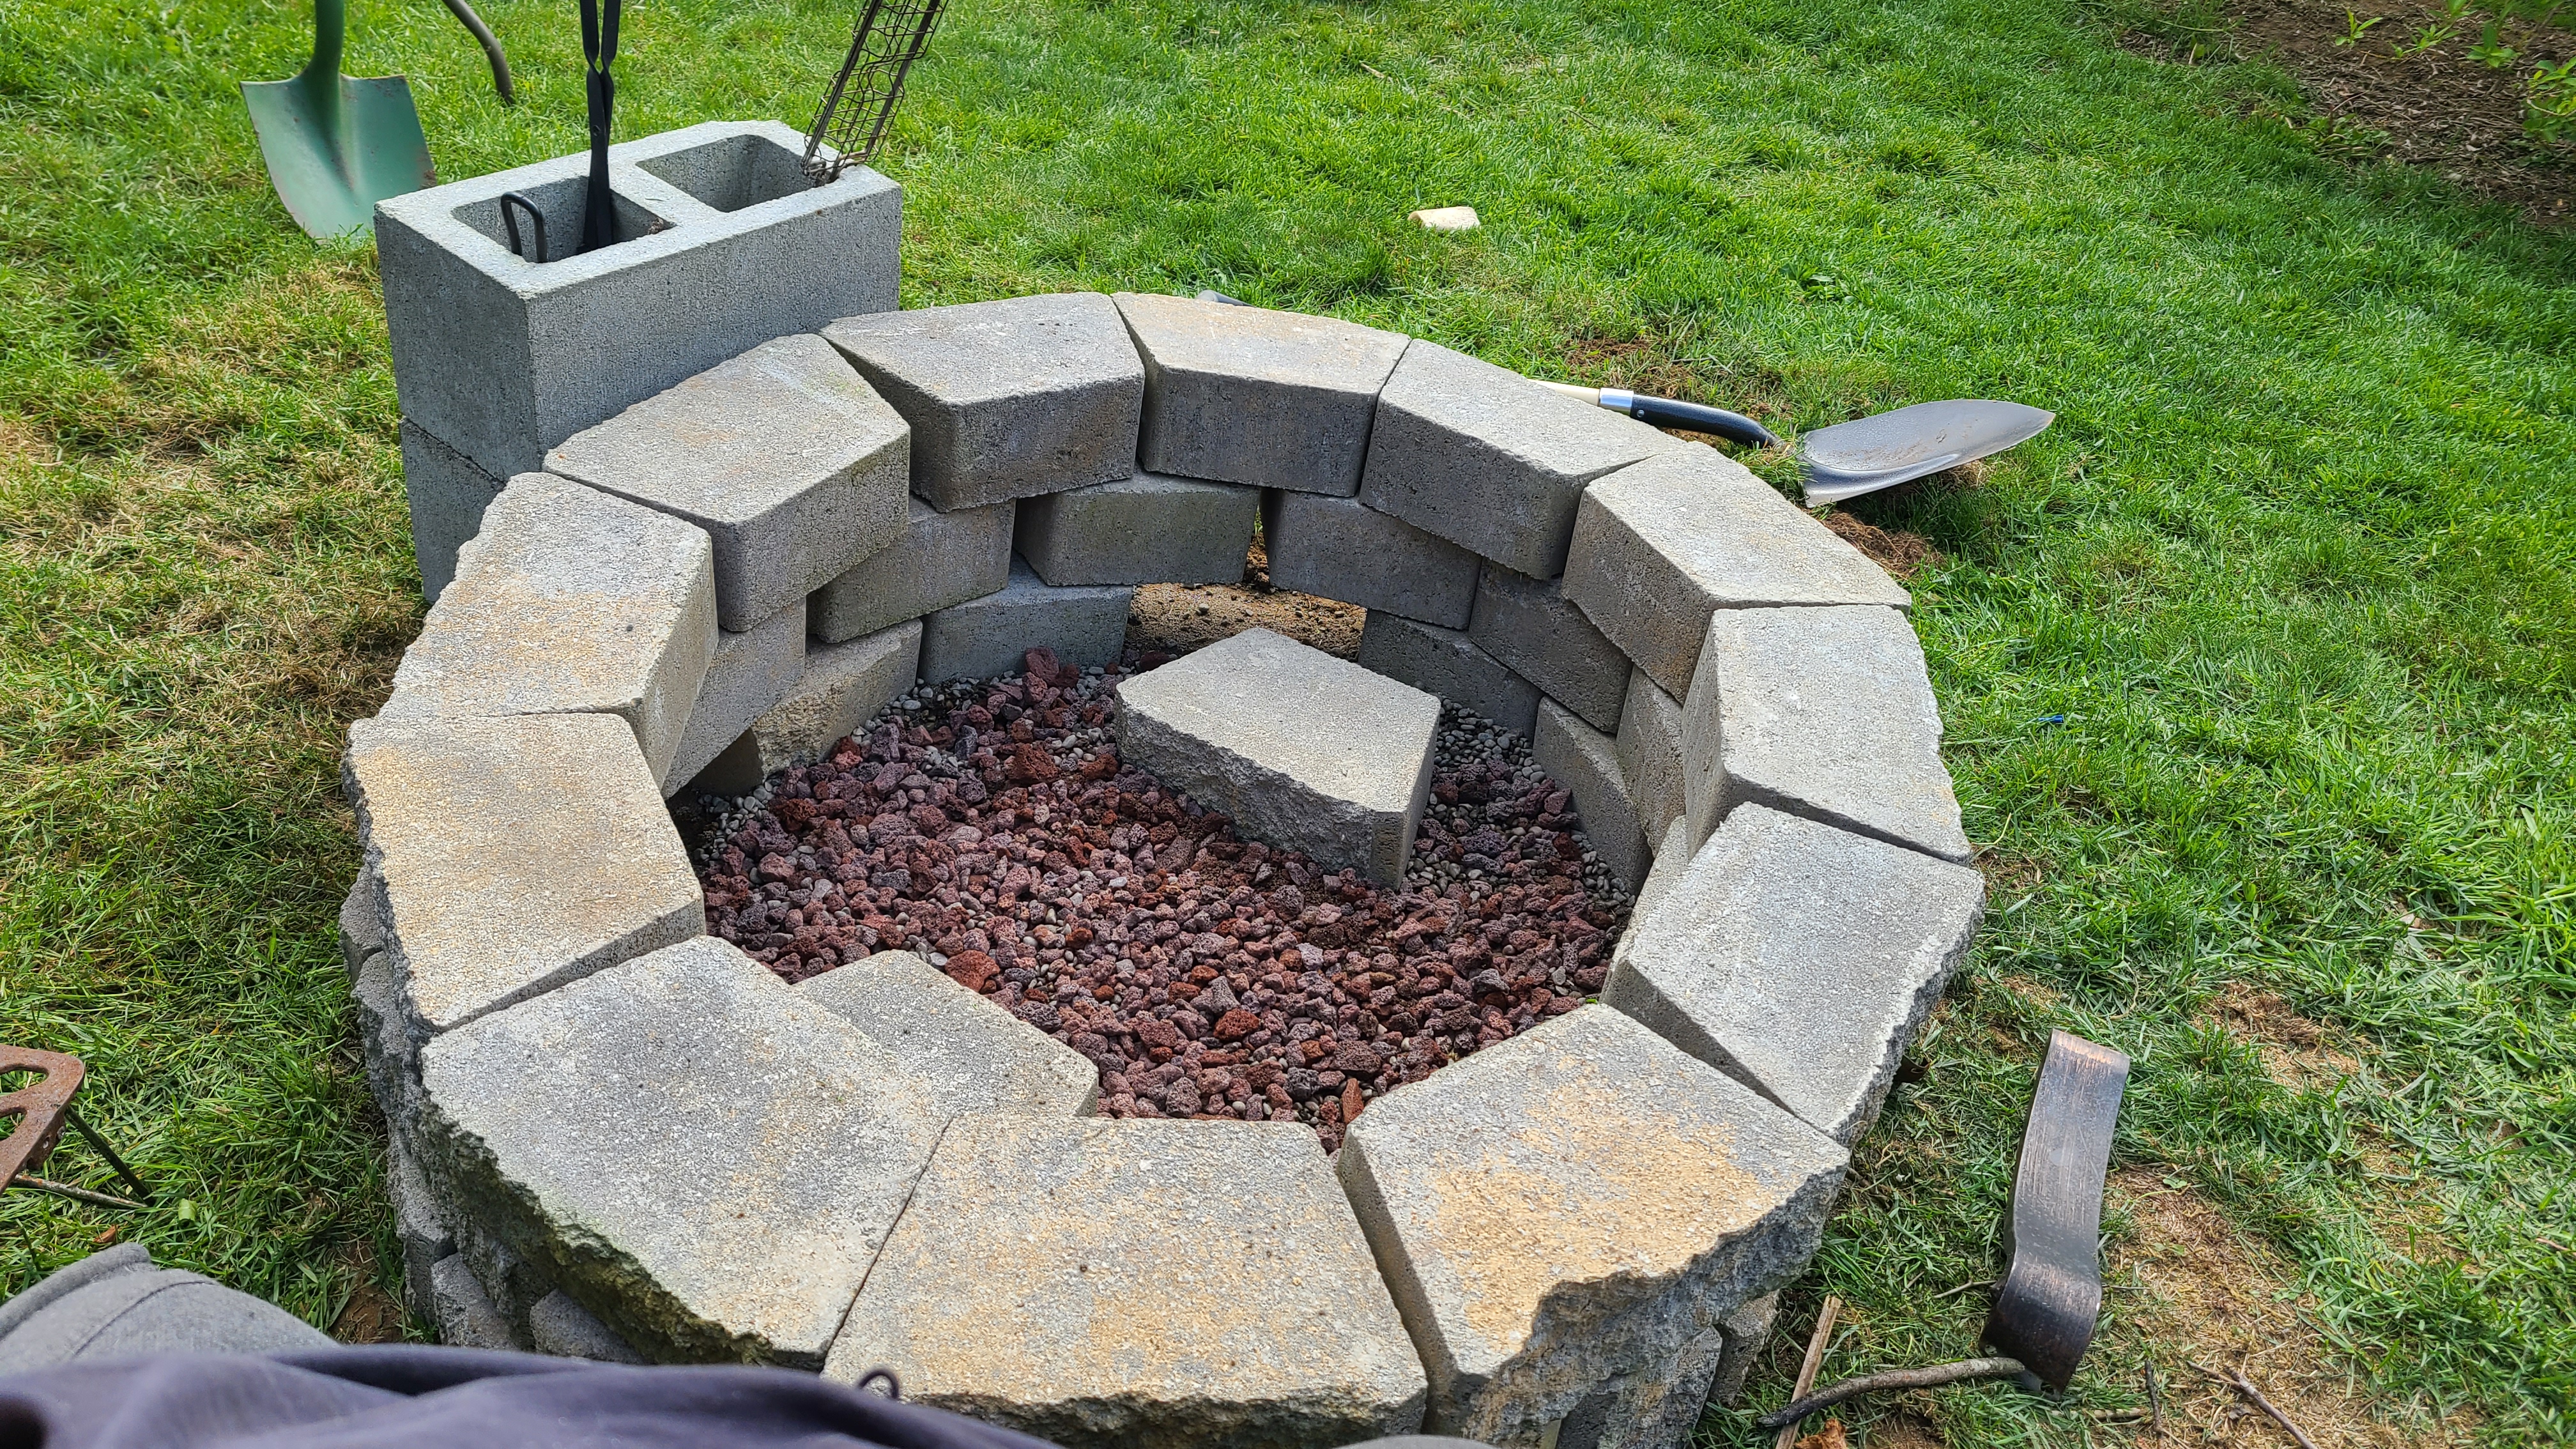

• Enjoy your new fire pit!.
 
• Optional step - I used a couple cinder blocks to make a holder for fire tongs, poker, skewers, etc. It works well.  
 
 • Another optional, but definitely recommend step - I built a matching bench, right up next to the pit, with some additional retaining wall blocks. It is perfect placement for building the fire whilst sitting, and some additional seating that looks great. 


Thursday, 5 October 2017

It's probably not the Zombie Apocalypse! (Realistic SHTF scenarios for regular people)


"Khaos is waiting for the zombie apocalypse! LOLOLOLOL!"

"We'll all just come to your house when the world ends! Harharhar!"

"Don't you mean BUNKER? Trololololol"

"She runs a Costco on the side! Hahaha!" 


Yup. Hilarity! I routinely hear these, and all sorts of other knee-slapping, solid bronze comedic content from friends and family.

The sad fact is, most "ordinary" people, it seems, still view stocking up beyond next week, having emergency supplies on hand, knowing how to do things without modern conveniences (and having the tools and materials to do so!), are silly, pessimistic, foolish, "asking for trouble" (WHAT!?), or downright crazy. Somehow, they equate being prepared for any eventuality with hoping for or hastening some looming, doomsday scenario.

Reality check, folks:
Being unprepared for an emergency won't keep one from happening! All it does is make you and those who depend on you more likely to suffer the consequences.

Being prepared frequently means the  difference between an emergency or survival situation and an inconvenience. In true disaster conditions, it can mean the difference between surviving and not.

If your car dies on the side of the road and you've gotta wait a couple hours for assistance, it could mean you have a "bathroom", plenty of water (and coffee!), something to snack on, protection from the weather, and maybe something to keep the kids (and grownups) entertained while you wait.

If the power goes out right before supper, it could mean you can still have a good meal, instead of scrounging for something that doesn't need electricity to prepare or having to go out to get something.

If the roads, power, and water are out in a good sized area for a few days or a week and you have taken the trouble to even stock up on a few days worth of food, water, extra medications, an outdoor cooking method, candles and/or battery powered lighting, and a few other supplies, things may be a little uncomfortable, but you're going to be just fine. Conversely, those people who refuse to plan ahead even in the slightest will have a true emergency on their hands. Not only are their own lives and well being, and that of their dependents, in danger. No - their (in)actions have endangered countless others as well. They've placed additional burden on their neighbours, communities, and emergency services. Now, rather than just having to worry about getting needed services and care to those who legitimately rely on electricity, special equipment, and such for medical reasons, first responders and rescue personnel have to spend precious moments and supplies bailing out some asshole who had the means to look after themselves, and chose not to. If it were up to me, I'd probably let them hang! Oh.. I'd take in their young kids and pets if I could, since they didn't have a say in the matter. The idiots though - those same folks who laugh the loudest about how stupid "preppers" are? They'd be on their own! Cause guess what? Nope. You're NOT coming to my house (or bunker, or BOL, or...) when the SHTF! And if you decide to try anyway, just remember your "Rambo" wisecracks regarding my gear, training, "paranoia", and defences, and think again.

Those few who happen to have been in my company when things have gone wrong... who enjoyed hot food and coffee, clean water, warmth, a safe and comfortable place to sleep, and that sort of thing when they would have otherwise been cold, hungry, afraid, and otherwise ill prepared when power or water has gone out, a vehicle has broken down in the middle of nowhere, roads have become impassable and the city (transit, emergency services, power, stores and other businesses closed) basically shut down, and the like, no longer join in the heckling. Of course, they don't risk being lumped in with the "loony" by standing up and saying anything either, but that's ok for now. Ya can't win 'em all!

Saturday, 28 January 2017

Roast Fingerling Potatoes & Winter Veggies

This blend of PNW winter crop veggies from my most recent Terra Organics delivery roasts up in a warm, mellow, hearty, and most delicious manner. A perfect complement to cold, winter nights!


Fresh, organic ingredients. So pretty!


Roast Fingerling Potatoes & Winter Veggies


Ingredients:
  • 1.5 lbs fingerling potatoes, whole or halved to maintain uniform size
  • 1 head cauliflower, cut into individual florets (keep leaves!)
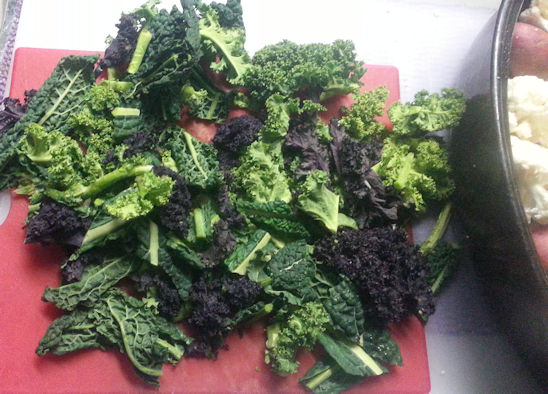
  • ¼ lb (or so) braising mix, roughly chopped
  • ½ leaves from cauliflower (put the rest in with your leftover braising mix, or use in soups, stir fry, roasted veggies, etc.)
  • 2-3 cloves garlic, minced
  • ½ – 1 leek, thinly sliced (ringwise)
  • 2-3 Tbs extra virgin olive oil
  • ½ tsp paprika
  • ½ Tbs dried, roasted red peppers
  • 1 sprig chopped or 1 pinch/dash dried coriander
  • 1 sprig chopped or 1 pinch/dash dried dill
  • crumbled feta, to taste
  • fresh ground pepper medley to taste
  • sea salt to taste


Directions:
  • Put all veggies and feta in small-med roasting pan or Dutch oven
  • Add feta
  • Drizzle generously with olive oil
  • Add herbs & spices
  • Toss well so everything is mixed and coated with oil and spices
Ready to go in the oven.
  • Bake, uncovered in 350° oven for about an hour and a half to 2 hours, stirring/tossing gently every 40 minutes or so, to make sure everything roasts evenly
  • It's done when potatoes & cauliflower are tender and golden browned, and greens are wilted and slightly crisped on the edges.
  • Enjoy!

    Done! Mmmmmm.
     Makes 6 servings (Though you'll probably want to double it – or more – for more than three people)
 
Notes:
  • If veggies are browning faster than getting tender, cover with foil or roaster lid until tender, then finish under broiler for a few minutes for any final browning.
  • This dish goes GREAT with roast beef!
  • Add some chicken breast or medium-firm tofu to the mix to turn this into a one dish meal
  • Omit cheese, for a completely vegan dish, or substitute/add parmesan, goat or sheep cheese, etc to change it up a bit
  • Remember; Anything that you can roast in the oven, you can roast in the grill or fire!!