Showing posts with label Oven. Show all posts

Monday, 3 February 2020

Recipe ~ Maple Dijon Glazed Salmon & Brussels Sprouts


As always, if you just want the recipe, without the story behind it, click here, or check out the AllRecipes Link. And if you make it (or someone else makes it and you eat it), PLEASE leave a review there too!


This was a dish inspired, like many, by my Imperfect Produce delivery. In fact, I was originally planning on using the Maple-Mustard Glazed Salmon & Brussels Sprouts Sheet Pan Dinner recipe they posted that week, to go with the Brussels sprouts in my delivery, but when have I ever been known to just use a standard recipe for anything? 

So, I started assembling the ingredients, took a couple pictures, and then got chopping and mixing. 
I already had substituted a small onion for the shallot, just because I didn't have any shallots on hand, and had decided to put some dill in it.
 But then, when the glaze was all mixed up, it just didn't smell right, and I knew it was because there were ingredients missing.


  I mean, even without dill, who does a salmon glaze without garlic? Not me, that's who! Sure, I have made and eaten salmon without either of those things once or twice, but, meh. Besides, I had some fresh dill that was starting to look a little less fresh, and my dill plant needed a trim again, so in they both went. 
It was definitely smelling closer to what I wanted, but something was still missing. Then I thought, "Oh! this slight sweetness from the maple would really be enhanced by the herbal sweet of some tarragon, and I just happen to have some ready for its first small pruning!"
As it turns out, I had to supplement it with some additional, dried tarragon as well, but next time, it will all be freshly harvested.

So, here are the Brussels sprouts all coated in goodness. 


 I also didn't like all the extra steps and wasted dishes that the original recipe used, so I streamlined it, and used my cast iron Dutch oven instead of a baking sheet, because I generally prefer the results when cooking with cast iron. This was not an exception. 

Here we are going into the oven...

 
 And coming out of the oven...


  And served on a bed of freshly harvested sprouts and garnished with fresh parsley and chives, cause they needed a trim anyway and it adds extra dimensions to the look, taste, and texture of the dish.
 

And then we eated* it! :D

*(Yes, I know "ate" is correct. I like "eated". So there!)

And now, without further adoooooo... The recipe!

 Maple Dijon Glazed Salmon & Brussels Sprouts

Equipment:

  • Big bowl
  • Whisk
  • Oven safe pan 

Ingredients: 

    • 1 lb or so salmon, cut into 4-6 oz fillets (fresh or frozen)
    • 3 Tbs maple syrup
    • 1/4 cup whole grain spicy Dijon mustard
    • 3-4 Tbs olive oil, plus extra for pan
    • 3 Tbs apple cider vinegar
    • 1 small shallot or onion, chopped
    • 2 lbs Brussels sprouts, trimmed & cut in half
    • 2 tsp sea salt or to taste
    • 1 Tbs Ground pepper or to taste
    • 2-3 cloves minced garlic
    • 2-3 sprigs fresh dill, chopped
    • about 1 Tbs fresh tarragon, chopped
    • Fresh parsley, chives, and/or sprouts for serving (optional)

Directions: 

    • Preheat oven to 425°.
   
    • Whisk maple syrup, mustard, olive oil, vinegar, shallot/onion, garlic, dill, and tarragon together in a bowl large enough to accommodate Brussels sprouts and allow room for tossing/mixing.

    • Dump Brussels sprouts in the bowl and toss until well coated with glaze mixture.
   
    • Oil the bottom of a cast iron Dutch oven (preferred), rimmed baking sheet, or casserole dish with the remaining olive oil and tip the Brussels sprouts in, without dumping in the leftover glaze.
   
    • Swish and flop the salmon filets around in the bowl to coat well with remaining glaze and arrange them on top of the Brussels sprouts. Use your finger or a rubber spatula to get every last drop you can of the glaze drizzled over everything.

    • Roast until salmon is flaky and Brussels sprouts are tender and well browned, around 18-20 minutes.
   
    • Serve, garnished with fresh parsley and chopped chives, on a bed of alfalfa or other sprouts, if desired.
   

Notes:

    • You can use salmon filets right out of the freezer too. Just add another 10-20 minutes of cook time, checking frequently, or insert a thermometer and remove when fish internal temperature is 145°F
   
    • If the fish is done, but you don't have that nice, brown crusting on top, turn the broiler on high for just a few minutes, monitoring closely so you don't overdo it.
   
    • You can absolutely use other cruciferous veggies instead or or in addition to the Brussels sprouts, and it will still turn out great!
    

Monday, 27 January 2020

Recipe ~ Creamed Lemon Herb Chicken Rice Bake

As always, if you just want the recipe, without the story behind it, click here, or check out the AllRecipes Link. And if you make it (or someone else makes it and you eat it), PLEASE leave a review there too!

 
As is often the case, this recipe came about because I needed to use up stuff before it went bad, and my search for a recipe didn't yield the results I wanted. 

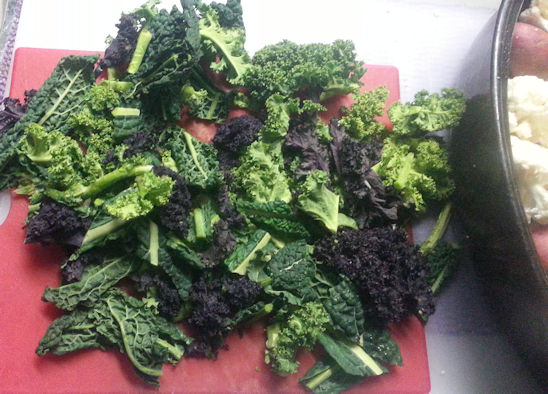
 This time, I had a lot of extra thyme on my hands, from the necessary pruning of my herb garden, a couple lemons that were beginning to get elderly, an abundance of carrots (3+lbs!), and a nice bunch of kale that was in danger of being squished too much in an overly full produce crisper drawer. 
So, it was time to start getting creative. Some kind of lemon thyme chicken and rice was obvious to me, so I started looking on the net. 

There are lots of recipes out there for lemon thyme chicken, and it's pretty popular and is definitely tasty, but wasn't quite what I was looking for. I wanted something more hearty, that would be an entire meal, and didn't need a ton of steps. I was also kind of craving a creamy sort of dish, and knew I wanted the carb base to be rice. 
Most of the recipes I found that were even close to what I was thinking called for a ton of extra steps and extra pans that were, IMO, unnecessary. Also, pre-cooking the chicken and onions in extra oil, just to put them in a pan that already has oil? Why? More time, less healthy. Just no!


So, that is how this dish was born! 
It is perfect for when you will be home, but have other things to do, cause you can do a few minutes of work and then just leave it to do its thing with minimal checking and no stirring, turning, basting, etc. 
It's also great for tossing in small amounts of whatever veggies you have on hand, but not really enough for a dish on their own. 

You do need to make the marinade and put the chicken in it at least a couple hours in advance, but if you just put the chicken straight from the freezer into the marinade the day or 2 before, you will be marinating it whilst it thaws, so more efficient and easier. 

Here are a couple photos of the marinade mixture all ready for the chicken to be added. 


I like easy! Don't you?

Don't forget to save the bones for free, delicious, homemade chicken broth!
              

Creamed Lemon Herb Chicken Rice Bake

INGREDIENTS:

    •  6-8 or so chicken thighs w/skin and bones (you can do skinless/boneless, but it will be less flavourful and more dry)

 
    • Marinade
        • 1/4 Cup olive oil
        • 1/3 cup lemon juice
        • 2-3 Tbs Worcestershire sauce
        • 1 med-lg sliced onion
        • 5+ cloves minced garlic
        • 2-4 sprigs thyme
        • 1-2 sprigs rosemary
        • 2 Tbs or so oregano
        • 1 Tbs onion powder
        • sm-med lemon sliced
        • Black pepper to taste (I use about 1 Tbs)
    • 2 cups uncooked rice
    • 4-5 cups chicken broth or water
    • 1 can French onion soup*
    • 2 cans cream of mushroom soup*
    • 1/2 tsp salt or to taste
    • 1/2 tsp black pepper or to taste
    • 1 large or 2-3 med/small carrots, sliced or chopped (optional)
    • A handful or so kale, roughly chopped (optional)
    • Whatever veggies you have on hand and need/want to use
              
*(You can omit the soups, and use extra chicken, beef, or veg broth, and add a cup of milk and a couple Tbsp flour)

DIRECTIONS:
Earlier in the day or up to 2 days prior:
    • Combine marinade ingredients in a Ziploc type bag. Tear the herbs into smaller pieces and rub/bruise them between your fingers as you drop them into the bag.
    • Squish everything around in the bag, rubbing bag sides together, until everything is well combined and onions are kind of soft.
    • Add chicken to bag and squish around more until all chicken is well coated
    • Squeeze all excess air from bag and store in the fridge at least an hour or so, preferably overnight, up to 2 days, turning the bag over once or twice a day to marinate evenly.
Day of:
    • Preheat oven to 350°F.
    • Remove chicken from bag and set aside (or just be careful when dumping marinade stuff)
    • Combine rice, veggies, soups, water/broth, and half the marinade mixture (including solids) in a cast iron Dutch oven or greased casserole dish.
    • Stir well, until everything is evenly distributed.
    • Dump chicken and remaining bag contents on top of rice mixture.
    • Arrange chicken, lemon, and onion pieces evenly across the top.
    • Season chicken with salt, pepper, or other seasonings (I use Montreal steak seasoning) to taste.
    • Bake for an hour or so (until rice is tender and chicken internal temp is 175°F**).
   
**(Yes, the chicken is SAFE to consume when cooked to 165°F, but thigh meat should be cooked to 175-180°F in order to dissolve the connective tissue, resulting in more tender, juicy chicken. Science! It works.)

Tuesday, 10 October 2017

Save those seeds! It's not just pumpkin seeds that make great roasting!

It's Thrifty Food Tip time again, and since it's a classic fall morning here at the Wolf Den, I figured this would be the perfect thing for the season.


Roasted pumpkin seeds are definitely one of those things we associate with autumn. Their warm, toasty, nutty, slightly salty flavour makes for a great, healthy snack. While the pre-packaged ones are ok, nothing beats having them fresh, just as soon as they're cooled off enough from the oven! 
(Hmm.. Speaking of which, now I've got a craving! That's a hazard of writing the food-related portions of this blog. LOL)

As tasty as they are, what's even better is a medley of roasted/toasted seeds. You can roast up the seeds from cantaloupe, honeydew, watermelon, acorn squash, spaghetti squash, butternut squash, and pretty much any other gourd, squash, or melon you can think of, with delicious and nutritious results. 

That's right; I said nutritious!
Squash and melon seeds are simply teeming with health benefits.

Cantaloupe, honeydew, and other "muskmelon" seeds are super high in antioxidant vitamins, minerals, amino acids, as well as being a great source of fibre and healthy fats. 
Watermelon seeds contain all those too, in addition to a good dose of folate (AKA vitamin B9), iron, and the plant protein, lycopene, which, in addition to being a great protein source, is another heart health booster.

Not to be outdone, squash seeds contain all the above vitamins and minerals, plus zinc, which is another immune system benefactor. Zinc also promotes healthy cell growth and division, sleep, mood, senses of taste and smell, eye and skin health, insulin regulation, and increases prostate health.

 Vitamins A, C, and E can improve and preserve your vision by helping to prevent macular degeneration, and, of course, we all know that vitamin C gives us a great boost to our immune system, which, considering that fall also marks the start of cold and flu season, is an especially good thing.
 

Important minerals contained in the seeds, like magnesium, phosphorous, iron, calcium, and potassium help control cholesterol, regulate blood pressure and cardiovascular function, improve bone density, immunity, metabolism, and brain function, and decrease the risk of developing type 2 diabetes and cancer
The heart healthy omega-3 fatty acids help reduce the risk of stroke, heart attack, and other cardiovascular diseases by lowering the levels of "bad" (LDL) cholesterol in the blood.

Finally, a diet high in fibre adds its own cholesterol, blood pressure, and blood glucose lowering properties, as well as promoting bowel health, for the prevention of things like IBS, diverticulosis, and diverticulitis. 

SO...
With all those health perks, great taste, and a FREE price tag, what's not to love?

Oh! And did I mention that it's mega simple to roast them, you can give them just about any flavour profile you want, and it's a great, fun activity to do with kids? 


Ingredients: 
  • seeds
  • enough oil (coconut, olive, grapeseed, peanut, etc.. whatever you want) to lightly coat the seeds
  • salt, pepper, and/or whatever spices/seasonings you like


Directions:
  1. separate seeds from the bulk of the pulp and give them a quick rinse. Don't worry about removing all of the pulp/flesh. It will roast up nicely and add the flavour and fibre content.
  2. Preheat oven to 300°F. (you can use a higher temp, however, keeping it at or below
    300°F will retain most of the nutrients which high heat will destroy.)
  3. Toss together all ingredients until seeds are coated evenly with oil and seasonings
  4. Spread seeds in a single layer in a cast iron skillet, stoneware, or parchment lined baking sheet. Bake, checking and stirring every 15 minutes, until seeds are crisp and pulp is caramelized, probably about 20-40 minutes. 
  5. Let cool completely before serving/eating (OK.. Who am I kidding? At least let them cool enough to avoid burning yourself or others!)


Seasoning suggestions:
  • Olive oil, sea salt, and freshly ground pepper medley
  • Peanut oil, soy sauce, and sesame oil. Add extra flavour and texture with some dried seaweed flakes and/or kick it up a notch with some hot chilli oil. 
  • More savoury seasoning ideas: curry, cumin, chilli powder, garlic powder, onion powder, ranch dressing powdered mix, other dry soup or dip mixes
  • coconut oil, cinnamon, nutmeg, and vanilla. Add a little sweetness with a drizzle of honey
  • coconut oil, cocoa powder and cinnamon
  • coconut oil, ground cloves and cardamom

What to do with roasted seeds:
  • Use as a coating for fried chicken
  • Add to home made granola
  • Bake into granola bars
  • Top your yogurt
  • Mix into your oatmeal
  • Add to dry cereal
  • Put them in trail mix
  • Add to smoothies
  • Use in whole grain and seed breads
  • Add to muffins, coffee cake, and other baked goods
  • Add to salads
  • Use them in pesto
  • And, of course, you can just munch on them by themselves!

Saturday, 28 January 2017

Roast Fingerling Potatoes & Winter Veggies

This blend of PNW winter crop veggies from my most recent Terra Organics delivery roasts up in a warm, mellow, hearty, and most delicious manner. A perfect complement to cold, winter nights!


Fresh, organic ingredients. So pretty!


Roast Fingerling Potatoes & Winter Veggies


Ingredients:
  • 1.5 lbs fingerling potatoes, whole or halved to maintain uniform size
  • 1 head cauliflower, cut into individual florets (keep leaves!)
  • ¼ lb (or so) braising mix, roughly chopped
  • ½ leaves from cauliflower (put the rest in with your leftover braising mix, or use in soups, stir fry, roasted veggies, etc.)
  • 2-3 cloves garlic, minced
  • ½ – 1 leek, thinly sliced (ringwise)
  • 2-3 Tbs extra virgin olive oil
  • ½ tsp paprika
  • ½ Tbs dried, roasted red peppers
  • 1 sprig chopped or 1 pinch/dash dried coriander
  • 1 sprig chopped or 1 pinch/dash dried dill
  • crumbled feta, to taste
  • fresh ground pepper medley to taste
  • sea salt to taste


Directions:
  • Put all veggies and feta in small-med roasting pan or Dutch oven
  • Add feta
  • Drizzle generously with olive oil
  • Add herbs & spices
  • Toss well so everything is mixed and coated with oil and spices
Ready to go in the oven.
  • Bake, uncovered in 350° oven for about an hour and a half to 2 hours, stirring/tossing gently every 40 minutes or so, to make sure everything roasts evenly
  • It's done when potatoes & cauliflower are tender and golden browned, and greens are wilted and slightly crisped on the edges.
  • Enjoy!

    Done! Mmmmmm.
     Makes 6 servings (Though you'll probably want to double it – or more – for more than three people)
 
Notes:
  • If veggies are browning faster than getting tender, cover with foil or roaster lid until tender, then finish under broiler for a few minutes for any final browning.
  • This dish goes GREAT with roast beef!
  • Add some chicken breast or medium-firm tofu to the mix to turn this into a one dish meal
  • Omit cheese, for a completely vegan dish, or substitute/add parmesan, goat or sheep cheese, etc to change it up a bit
  • Remember; Anything that you can roast in the oven, you can roast in the grill or fire!!