As usual, we're going with the theme of, "don't throw it away"!
Those unused condiment packs from take out or delivery meals, like spice or seasoning packets, dipping sauces, salad dressings, honey, sweet and sour, soy sauce, hot sauce, jams/jelly/preserves, etcetera, as well as your own leftover bits/dregs of salad dressing, beer, wine, spirits, soft drinks, juice, mixed drinks,and all manner of other small bits of stuff can be reused and turned into delicious marinades, glazes, and other additions to meals.
Sometimes, you even find something that ends up being the "secret ingredient" that pushes a good meal over the top to awesome!
I often go hunting in the kitchen for the almost empty bottles of sauces or salad dressings to incorporate into a spur of the moment marinade.
Use a little bit of water, beer/ale/lager/etc, wine, coffee, soft drink or juice to pour in almost empty bottles and shake up to get the last little bits out of the bottle and into your delicious creation!
As you add each new ingredient, use your nose. Smell the mixure. Smell things you have around to possibly put in it. Smell what you want to marinate. Imagine how those will be combined! Science has revealed what home cooks and famous chefs alike have known all along; 80%-90% of how food "tastes" is actually how it smells!
So put your sniffer to work to whip up an amazing, on the fly marinade for your next meal or few.
And remember, it's not just meats that you can marinate a few hours or a few days to turn a decent dish into a decadent delight that will impress the heck out of everyone who tastes it.
As for how to save those little condiments and culinary bits and bobs...
Packs that are unopened and/or already individually packaged can go right in the freezer as-is. I like to put them in Ziploc, freezer bags, just to keep them together and easy to find.
For stuff that isn't pre-packaged, check out this post.
Showing posts with label leftovers. Show all posts
Showing posts with label leftovers. Show all posts
Tuesday, 5 May 2020

Wednesday, 15 April 2020
Getting the most out of your lettuce harvest!
So, as you already know, if you've been reading this blog much at all, I started growing my own food with a couple AeroGarden setups last December. I have gone from some seeds/seed pods and water to a kitchen that looks kinda like a jungle with all the potted plants (from transplanting) everywhere as well as the AeroGardens, and it's ALL edible, and in many cases, also medicinal. Which is awesome, but isn't really what this post is about.
This is, specifically, regarding my lettuces, which, by now, I have divided and regrown countless times. I went from 6 pods initially to... I don't even know now. I have lettuce everywhere.
Seriously, just today I harvested about 2.5 POUNDS of lettuce leaves, cause even though I still had about 1/2 pound left in the fridge (and I eat a LOT of salad), it had gotten tall and big enough to interfere with the grow lights and keep new leaves from growing properly!
There's still enough left on the plants that I could make another huge salad just with another harvest, but I can also let them grow just fine for another few days or so before I have to prune any more.


 That is a freaking LOT of lettuce!
I have enough excess now that I can start trading my extra salad greens with a friend who keeps chickens, for fresh eggs. How awesome is that!? (It's pretty dang awesome!)
Anyway, initially, I was thinking the harvest "season" for them was going to be a lot shorter than it is, because that is what everyone said, including the AeroGarden folks. Well, I've already had about double the "expected" harvest season, but I still thought I was going to need to "retire" some of the plants pretty soon. Here's why.


At a certain point, the lettuce starts to bolt, no matter how well and faithfully you've been pruning. The stalks start getting taller and more woody, and you still have a decent amount of leaves, but you also have the lettuces trying to flower, and you've got a lot more thick stems that are just too tough to enjoy in a salad, even if you chop them up pretty well. So, in terms of growing "real estate", if you have a limited area in which to grow all that you are going to grow, you end up with more by-product than it's worth to keep the plants growing, rather than starting new plants, which are almost exclusively tasty, tender, lettuce leaves.
Right?
Wrong!!
As it turns out, these stems and flower buds are totally usable in anything where you'd use broccoli stems, carrots, thicker asparagus, etc.
Like the awesome "stratarole" that is in the oven as I type this.

Also great chopped up and roasted with root veggies or Brussels sprouts, tossed in stir frys, minced finely into soups, sauces (like spaghetti sauce), or anywhere else you want to sneak in some extra leafy green veggie nutrition.
And, speaking of nutrition, get this; The stalks and stems often have an even higher concentration - up to double for certain nutrients, like vitamin C - of the vitamins and minerals found in the leaves!
The flavour of the stalks is generally going to be similar to the leaf flavour profile, and may be a little bitter, owing to lactucarium - the milky, white sap that is produced in this phase of growing (which also has medicinal properties, as a mild sedative and analgesic, in sufficient quantities). It's perfectly edible and not at all harmful, but you could rinse it off if you wanted to. I never bother. Once the stalks are cooked and even lightly seasoned, it's not at all noticeable, and even less so cooked along with other ingredients.
The leaves you get from these stalks are going to tend to be a bit more bitter than when the plant was younger, but as long as you're mixing them in with your younger lettuces, it isn't at all unpleasant. You may not be as prone to want to munch them directly from the stalk as you harvest, like the more tender leaves, if you prefer only sweeter lettuces, but they will still be a super tasty addition to your salads too.
To keep harvesting the stalks and leaves, just use sharp scissors or small pruners and cut the stalks right off, as far down as you feel like. Just make sure there is still some budding leave growth showing below the cut, and it will be all good. Strip the leaves off and put with the rest of your leaves, and store the stems like you would store broccoli or asparagus.


I suppose there may be a point at which even this extended harvest ends, but it's been four months, and I have yet to find it. I'll update when/if I discover it.
Enjoy your new cooking vegetables, and please feel free to comment or contact me with any new recipes or uses you find with it!
This is, specifically, regarding my lettuces, which, by now, I have divided and regrown countless times. I went from 6 pods initially to... I don't even know now. I have lettuce everywhere.
Seriously, just today I harvested about 2.5 POUNDS of lettuce leaves, cause even though I still had about 1/2 pound left in the fridge (and I eat a LOT of salad), it had gotten tall and big enough to interfere with the grow lights and keep new leaves from growing properly!
There's still enough left on the plants that I could make another huge salad just with another harvest, but I can also let them grow just fine for another few days or so before I have to prune any more.


I have enough excess now that I can start trading my extra salad greens with a friend who keeps chickens, for fresh eggs. How awesome is that!? (It's pretty dang awesome!)
Anyway, initially, I was thinking the harvest "season" for them was going to be a lot shorter than it is, because that is what everyone said, including the AeroGarden folks. Well, I've already had about double the "expected" harvest season, but I still thought I was going to need to "retire" some of the plants pretty soon. Here's why.


Right?
Wrong!!
As it turns out, these stems and flower buds are totally usable in anything where you'd use broccoli stems, carrots, thicker asparagus, etc.
Like the awesome "stratarole" that is in the oven as I type this.

Also great chopped up and roasted with root veggies or Brussels sprouts, tossed in stir frys, minced finely into soups, sauces (like spaghetti sauce), or anywhere else you want to sneak in some extra leafy green veggie nutrition.
And, speaking of nutrition, get this; The stalks and stems often have an even higher concentration - up to double for certain nutrients, like vitamin C - of the vitamins and minerals found in the leaves!
The flavour of the stalks is generally going to be similar to the leaf flavour profile, and may be a little bitter, owing to lactucarium - the milky, white sap that is produced in this phase of growing (which also has medicinal properties, as a mild sedative and analgesic, in sufficient quantities). It's perfectly edible and not at all harmful, but you could rinse it off if you wanted to. I never bother. Once the stalks are cooked and even lightly seasoned, it's not at all noticeable, and even less so cooked along with other ingredients.
The leaves you get from these stalks are going to tend to be a bit more bitter than when the plant was younger, but as long as you're mixing them in with your younger lettuces, it isn't at all unpleasant. You may not be as prone to want to munch them directly from the stalk as you harvest, like the more tender leaves, if you prefer only sweeter lettuces, but they will still be a super tasty addition to your salads too.
To keep harvesting the stalks and leaves, just use sharp scissors or small pruners and cut the stalks right off, as far down as you feel like. Just make sure there is still some budding leave growth showing below the cut, and it will be all good. Strip the leaves off and put with the rest of your leaves, and store the stems like you would store broccoli or asparagus.


I suppose there may be a point at which even this extended harvest ends, but it's been four months, and I have yet to find it. I'll update when/if I discover it.
Enjoy your new cooking vegetables, and please feel free to comment or contact me with any new recipes or uses you find with it!
Tuesday, 10 October 2017
Save those seeds! It's not just pumpkin seeds that make great roasting!
It's Thrifty Food Tip time again, and
since it's a classic fall morning here at the Wolf Den, I figured
this would be the perfect thing for the season.

Roasted pumpkin seeds are definitely
one of those things we associate with autumn. Their warm, toasty,
nutty, slightly salty flavour makes for a great, healthy snack. While
the pre-packaged ones are ok, nothing beats having them fresh, just
as soon as they're cooled off enough from the oven!
(Hmm.. Speaking of which, now I've
got a craving! That's a hazard of writing the food-related portions
of this blog. LOL)
As tasty as they are, what's even
better is a medley of roasted/toasted seeds. You can roast up the
seeds from cantaloupe, honeydew, watermelon, acorn squash, spaghetti
squash, butternut squash, and pretty much any other gourd, squash, or
melon you can think of, with delicious and nutritious results.
That's right; I said nutritious!
Squash and melon seeds are simply
teeming with health benefits.
Cantaloupe, honeydew, and other "muskmelon" seeds are super high in antioxidant vitamins, minerals, amino acids, as well as being a great source of fibre and healthy fats.
Watermelon seeds contain all those
too, in addition to a good dose of folate (AKA vitamin B9), iron, and
the plant protein, lycopene, which, in addition to being a great
protein source, is another heart health booster.
Not to be outdone, squash seeds contain all the above vitamins and minerals, plus zinc, which is another immune system benefactor. Zinc also promotes healthy cell growth and division, sleep, mood, senses of taste and smell, eye and skin health, insulin regulation, and increases prostate health.
Vitamins A, C, and E can improve and preserve your vision by helping to prevent macular degeneration, and, of course, we all know that vitamin C gives us a great boost to our immune system, which, considering that fall also marks the start of cold and flu season, is an especially good thing.
Important minerals contained in the
seeds, like magnesium, phosphorous,
iron, calcium, and potassium help
control cholesterol, regulate blood pressure and
cardiovascular function, improve bone density, immunity, metabolism,
and brain function, and decrease the risk of developing type 2
diabetes and cancer
The heart healthy omega-3 fatty acids
help reduce the risk of stroke, heart attack, and other
cardiovascular diseases by lowering the levels of "bad"
(LDL) cholesterol in the blood.
Finally, a diet high in fibre adds
its own cholesterol, blood pressure, and blood glucose lowering
properties, as well as promoting bowel health, for the prevention of
things like IBS, diverticulosis, and diverticulitis.
SO...
With all those health perks, great
taste, and a FREE price tag, what's not to love?
Oh! And did I mention that it's mega
simple to roast them, you can give them just about any flavour
profile you want, and it's a great, fun activity to do with kids?
Ingredients:
- seeds
- enough oil (coconut, olive, grapeseed, peanut, etc.. whatever you want) to lightly coat the seeds
- salt, pepper, and/or whatever spices/seasonings you like


Directions:
- separate seeds from the bulk of the pulp and give them a quick rinse. Don't worry about removing all of the pulp/flesh. It will roast up nicely and add the flavour and fibre content.
- Preheat oven to 300°F. (you can use a higher temp, however, keeping it at or below
300°F will retain most of the nutrients which high heat will destroy.) - Toss together all ingredients until seeds are coated evenly with oil and seasonings
- Spread seeds in a single layer in a cast iron skillet, stoneware, or parchment lined baking sheet. Bake, checking and stirring every 15 minutes, until seeds are crisp and pulp is caramelized, probably about 20-40 minutes.
- Let cool completely before serving/eating (OK.. Who am I kidding? At least let them cool enough to avoid burning yourself or others!)

Seasoning suggestions:
- Olive oil, sea salt, and freshly ground pepper medley
- Peanut oil, soy sauce, and sesame oil. Add extra flavour and texture with some dried seaweed flakes and/or kick it up a notch with some hot chilli oil.
- More savoury seasoning ideas: curry, cumin, chilli powder, garlic powder, onion powder, ranch dressing powdered mix, other dry soup or dip mixes
- coconut oil, cinnamon, nutmeg, and vanilla. Add a little sweetness with a drizzle of honey
- coconut oil, cocoa powder and cinnamon
- coconut oil, ground cloves and cardamom
What to do with roasted seeds:
- Use as a coating for fried chicken
- Add to home made granola
- Bake into granola bars
- Top your yogurt
- Mix into your oatmeal
- Add to dry cereal
- Put them in trail mix
- Add to smoothies
- Use in whole grain and seed breads
- Add to muffins, coffee cake, and other baked goods
- Add to salads
- Use them in pesto
- And, of course, you can just munch on them by themselves!
Tuesday, 26 September 2017
Delicious, Nutritious, Hearty Bone Broth/stock for Free
This weeks
thrifty food tip is how to make your own bone broth, absolutely
free.


(I'm cheating here, and using lots of the wording from my vegetable broth post, so if it looks familiar, that'll be why!)
You can buy chicken or beef broth in cans, cartons, or powder at the store, but not only is it pretty expensive, even for the cheap stuff, but it is also usually full of preservatives and artificial flavours and colours and very high in sodium to boot.
Instead, why not just make your own?
You'll need gallon freezer bags, a freezer, some cheesecloth (optional, but makes things much easier) or a wok skimmer or strainer, and a crock pot/slow cooker, rice cooker, Instant Pot, stock pot, or other large pot for simmering or pressure cooker, and a marker.
Every time you have bones left from cooking (or bringing home a roasted chicken), save them. You can even ask for take away bags/boxes to save bones from when you eat out, if you like. After all, you DID pay for everything on your plate!
Put them in all in labelled freezer bags and keep them in your freezer (if you have a deep freezer, better still!)
I have some separate bags for chicken, turkey, beef, pork, etc, some for general poultry, some specifically for smoked meats. You can separate them however you like.
When a bag gets full, time to make your broth (or start a new bag and make the broth later.. whichever).

- Line your pot with the cheesecloth, if using and dump all the bones in.
- Fill to the top with water.
- Add any additional salt or seasoning, if desired.
- Turn the crock pot on low and let it go for 8-16 hours.
- If you're using a rice cooker, turn it to the "cook" setting until it starts boiling, then leave it on warm for the same amount of time. Check water level periodically and add as needed.
- If using the stove, bring to a boil and then simmer on lowest possible setting for 3-5 hours, at least. Check water level periodically and add as needed.
- If you're using the Instant Pot/pressure cooker, set it to manual/pressure for 90-120 minutes and let it do a natural release.
- When it tastes like broth, turn off the heat and let it cool enough to handle.
- Pull up the cheesecloth and squeeze out all the liquid you can into the pot, or skim solids out with a wok skimmer or strainer. (The bones and scraps can then be composted or added to animal feed. Just make absolutely sure the bones are soft enough to easily crush with your fingers before giving to animals)
That's it!
Once it's done,
you can use it right away, or you can freeze or can it. For freezing,
I suggest using a rinsed out, cardboard milk carton, freezer
bags, reditainers, or, if you want more measuring control when you use
it, ice
cube trays.
Tuesday, 4 November 2014
Make your own homemade, healthy baby food for pennies!
Hi there! Here's this week's thrifty, healthy food tip...
Baby food is expensive, and the organic, no preservatives added sort is even MORE expensive! Why buy little jars of food for upwards of $10 per pound... and that's for the cheap stuff... when you can feed your baby the very same foods the rest of the family is eating for a tiny fraction of that!?
 It's easy. All you need is dinner, some liquid to add for the correct consistency (broth, juice, breast milk, water, etc) and a blender or food processor! Those little mini blender containers you can get, like these pictured, are pretty handy, but you can also just use the regular blender jar, a mini, "bullet" type blender, stick blender, or food processor.
Make sure that your blending container is clean before you start. You may want to run boiling water through it, just to be on the safe side.
All meats should be fully cooked, so if the steaks are rare, give baby's portions some extra time on the grill (or even in the microwave, if you must). You can put all the dishes in together, or, better still, to introduce your baby early on to varied tastes, blend them separately.
Blend the food to the consistency appropriate for your baby's stage of development, and, presto chango, baby food for pennies, and you have complete control over what goes into it!
This works for cereals and grains, meats, veggies, fruits, casseroles, quiche.. Pretty much anything! (I don't recommend salad! LOL)
I always made extra and froze it in ice cube trays to use later, when I didn't want to cook, but wanted the kids to have a healthy, home cooked meal. You can make different sized "cubes", depending on how much your baby tends to eat at one sitting. 20-30 seconds will heat up a full "cube" from a standard ice tray. Less than that if you're just thawing (like for fruits).
Baby food is expensive, and the organic, no preservatives added sort is even MORE expensive! Why buy little jars of food for upwards of $10 per pound... and that's for the cheap stuff... when you can feed your baby the very same foods the rest of the family is eating for a tiny fraction of that!?
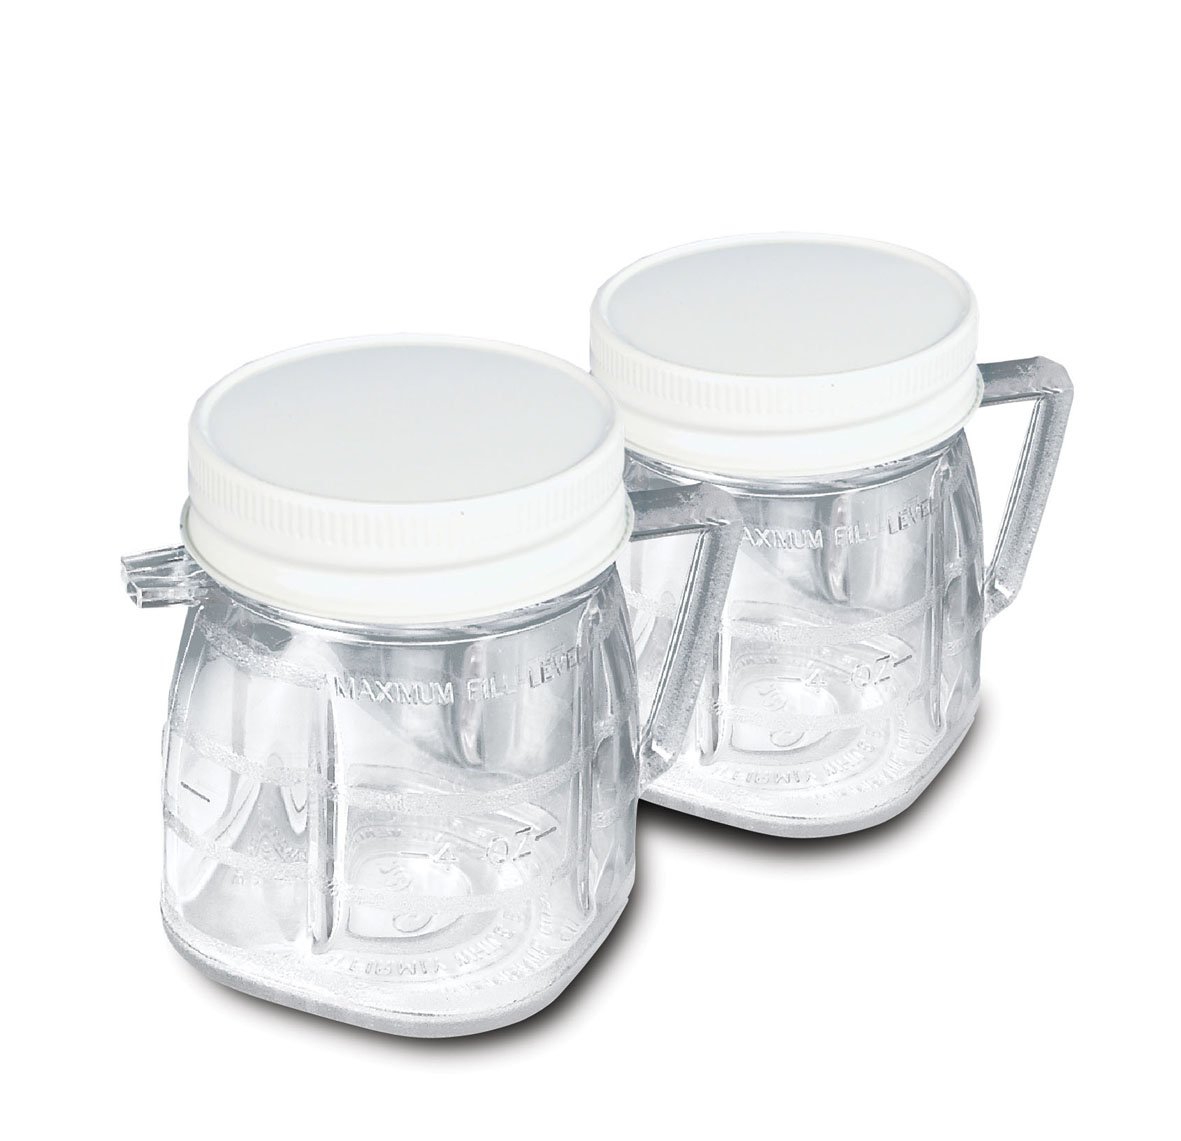 It's easy. All you need is dinner, some liquid to add for the correct consistency (broth, juice, breast milk, water, etc) and a blender or food processor! Those little mini blender containers you can get, like these pictured, are pretty handy, but you can also just use the regular blender jar, a mini, "bullet" type blender, stick blender, or food processor.
Make sure that your blending container is clean before you start. You may want to run boiling water through it, just to be on the safe side.
All meats should be fully cooked, so if the steaks are rare, give baby's portions some extra time on the grill (or even in the microwave, if you must). You can put all the dishes in together, or, better still, to introduce your baby early on to varied tastes, blend them separately.
Blend the food to the consistency appropriate for your baby's stage of development, and, presto chango, baby food for pennies, and you have complete control over what goes into it!
This works for cereals and grains, meats, veggies, fruits, casseroles, quiche.. Pretty much anything! (I don't recommend salad! LOL)
I always made extra and froze it in ice cube trays to use later, when I didn't want to cook, but wanted the kids to have a healthy, home cooked meal. You can make different sized "cubes", depending on how much your baby tends to eat at one sitting. 20-30 seconds will heat up a full "cube" from a standard ice tray. Less than that if you're just thawing (like for fruits).
Friday, 10 October 2014
What to do with Leftover Marinades
It's a common issue, perhaps more so in the warmer months...
We marinate meats (or other things) for the grill, but there's always some left.
You don't want to re-use it for the next batch, because it has juices from the previous, which can spoil the whole lot, but you don't want to just throw it out either. What a waste!
Here's what I do:
I stick the leftover bits in the freezer, in the same Ziplock freezer bags I used for the marinades (they are still labelled, of course). Then, I use them in soups, stews, or casseroles later, often in the crock pot. It's a great way to have an instant "flavour profile" for something which may otherwise be bland or unimaginative. You don't need a "recipe" to make a great meal - Just things from the basic food groups and some imagination!
As an example, a recent dinner was a soup made with the previous day's water from boiling corn on the cob, the leftover Cholula BBQ steak marinade (generous portion Cholula, a bit of whatever BBQ sauce you have lying around, minced garlic, and a bit of olive oil), a can of condensed cream of chicken soup, a can of chicken & rice soup, some leftover roasted chicken, a big can of green beans, a handful of rice, some dried, roasted red bell pepper, and dried mixed vegetables. Started in the slow cooker on low in the morning.
It made a delicious dinner, plus another couple of lunches!
Subscribe to:
Posts (Atom)